A leaking shower faucet isn’t just an annoying drip-drip sound that keeps you up at night—it’s also costing you money and wasting water. If you’ve noticed your shower isn’t as watertight as it should be, don’t worry.
You don’t need to be a plumbing expert or spend a fortune on repairs. With a little guidance, you can fix it yourself and stop that leak for good. Imagine the satisfaction of solving the problem on your own while saving on your water bill.
Ready to take control and seal that leaking faucet once and for all? Let’s dive in!
Table of Contents
Tools And Materials Needed
Sealing a leaking shower faucet requires preparation. Gathering the right tools and materials makes the job easier. Using proper equipment ensures a successful fix without damaging your faucet. Below is a list of essentials you’ll need to get started.
Basic Tools
A few basic tools are necessary for this task. A flathead screwdriver and a Phillips screwdriver help remove screws. An adjustable wrench is essential to loosen or tighten parts. You may also need a hex key set, depending on your faucet’s design.
Plumbing Tape
Plumbing tape, also called thread seal tape, is crucial. It helps create a watertight seal on threaded connections. Wrap it tightly around the threads before reassembling parts.
Replacement Parts
Sometimes, worn-out parts cause leaks. Purchase replacement washers, O-rings, or cartridge kits based on your faucet model. Check the faucet brand and type before buying new components.
Cleaning Supplies
Mineral deposits or debris can affect seals. Use a soft cloth and white vinegar for cleaning. A toothbrush works well for scrubbing tight spaces.
Bucket Or Towel
Keep a small bucket or towel handy. It helps catch dripping water during the repair process. This prevents messes and keeps the workspace dry.
Silicone Lubricant
Silicone lubricant is useful for maintaining O-rings and seals. It helps them last longer and ensures smooth operation. Avoid petroleum-based lubricants, as they can damage rubber parts.
Identifying The Leak Source
Identifying the source of a leaking shower faucet might seem tricky, but it’s often easier than you expect. Knowing exactly where the leak originates is the first step to fixing it efficiently. A small drip may not seem like a big deal, but it can waste gallons of water—and money—over time.
Inspect The Faucet Handle
Start with the faucet handle because leaks often begin here. Check for water seeping from the base of the handle or dripping when the shower is turned off. If you notice moisture, it could be a worn-out O-ring or gasket inside.
Turn the handle gently to see if it feels loose or wobbly. A loose handle can indicate internal damage that’s causing the leak. Keep a towel handy to dry off the area for a clearer view.
Examine The Showerhead
Next, look at the showerhead itself. Is water dripping from the head even after you’ve shut off the faucet? This could point to an issue with the valve inside the faucet. You might also see mineral buildup around the showerhead, which can cause uneven water flow and leaks.
If the showerhead is the culprit, you may need to clean it or replace its washers. A simple twist with a wrench can often reveal the source of the problem.
Check The Wall Behind The Faucet
Sometimes the leak isn’t visible on the faucet or showerhead—it’s hidden behind the wall. Look for signs like water stains, peeling paint, or damp spots near the shower. These are clear indicators of a deeper issue, like a broken pipe or faulty valve.
Don’t ignore these signs. If you suspect a hidden leak, consider calling a plumber to avoid further damage to your home.
Test For Water Pressure Problems
Uneven water pressure can also cause leaks in your shower faucet. Turn on the shower and observe how the water flows. If you notice sputtering or weak pressure, it might be a sign of pipe blockage or valve trouble.
High water pressure can force water through worn-out seals, leading to leaks. You can test pressure levels with a simple gauge from a hardware store.
By systematically inspecting these areas, you’ll pinpoint the leak source faster and save time on repairs. Did you find the leak in an unexpected spot? Share your experience in the comments below—it might help someone else troubleshoot their shower faucet issues!
Shutting Off The Water Supply
Fixing a leaking shower faucet can feel overwhelming, but it doesn’t have to be. One of the most critical steps in this process is shutting off the water supply. Without doing this, even a minor adjustment could lead to a watery mess—or worse, damage to your bathroom. Let’s break it down and make it simple.
How To Locate The Main Water Valve
Start by finding the main water shut-off valve in your home. It’s typically located in the basement, utility room, or near your water meter. If you live in an apartment, check under the sink or behind an access panel near the bathroom.
Don’t see a valve? Ask yourself: when was the last time you looked at your home’s plumbing setup? If you’re unsure, now’s the perfect time to familiarize yourself with it. Knowing where your main shut-off valve is can save you in more situations than just a leaky faucet.
Turning Off The Water For Just The Shower
If you don’t want to shut off water to the entire house, look for an isolation valve for the shower. These valves are sometimes hidden behind an access panel near the shower or tub. Turn the valve clockwise to shut it off completely.
No access panel? You might need to shut off the main water supply after all. It’s better to spend a few extra minutes finding the right valve than risking a flood.
Double-check The Water Is Off
Once you’ve turned off the water, test it. Turn on the shower faucet to see if any water comes out. If it’s a slow drip, give the valve another turn to ensure it’s fully closed.
Still seeing water? This could mean the valve is faulty or not fully shut. In that case, you may need to consult a plumber—but don’t skip this step. It’s better to be safe than sorry.
Shutting off the water supply isn’t just about preventing leaks while you work. It’s also about giving you peace of mind. Have you ever tried fixing something while water kept spraying everywhere? Trust me, it’s not fun.
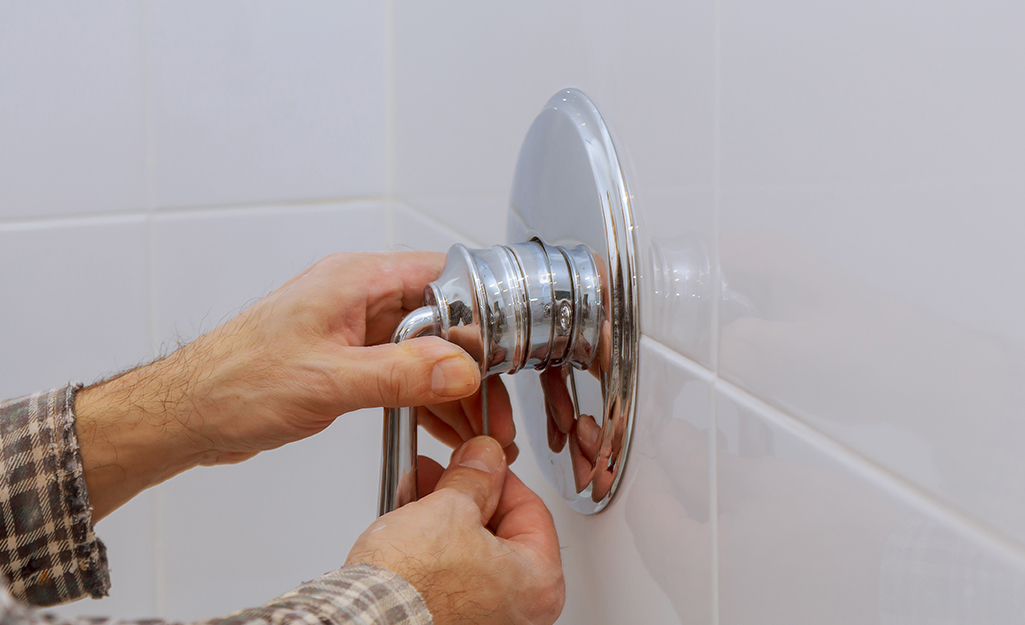
Removing The Faucet Handle
Loosen the screws on the faucet handle to remove it carefully. This allows access to the internal components. Make sure to keep the screws in a safe place for reassembly.
Removing the faucet handle is the first critical step to sealing a leaking shower faucet. It’s often simpler than you might think, but it does require a bit of patience and the right tools. By carefully removing the handle, you’ll gain access to the components that may be causing the leak, such as worn-out washers or cartridges.
Loosening Screws
Start by locating the screws that hold the faucet handle in place. In most cases, these screws are hidden beneath a decorative cap or cover. Use a flathead screwdriver or a small knife to gently pry off the cap without scratching the surface. Once exposed, use a screwdriver to loosen the screws. Turn them counterclockwise until they come out completely. If the screws are stuck, apply a small amount of penetrating oil and wait a few minutes. This can save you from stripping the screw head or damaging the handle.
Detaching The Handle
After removing the screws, you’ll need to pull the handle off the faucet. This might be straightforward if the handle is loose, but often mineral deposits or rust can make it stick. Don’t force it—wiggle it gently side to side to loosen it. If the handle still doesn’t budge, try using a handle puller, a handy tool specifically designed for this purpose. You can find one at most hardware stores. It’s worth the small investment, especially if you’re dealing with an older faucet. Once the handle comes off, clean any residue or debris from the exposed area to prepare for the next step. Isn’t it satisfying to know you’ve already tackled one of the trickiest parts? Removing the handle carefully ensures you won’t end up with more repairs than you started with. Are you ready for the next step?
Inspecting The Cartridge Or Valve
Inspecting the cartridge or valve in your shower faucet is a crucial step in fixing a leak. It’s where the water flow is controlled, and any damage here can lead to persistent drips. If you’ve noticed water pooling or a constant trickle, it’s time to take a closer look.
Signs Of Wear And Tear
Wear and tear on the cartridge or valve can be subtle or obvious. Look for visible cracks, corrosion, or mineral buildup. These can block the valve’s smooth operation and cause water to leak.
Another sign is stiffness when turning the handle. If it feels harder to twist or doesn’t move as smoothly as before, your cartridge or valve may be damaged. Pay attention to inconsistent water pressure or temperature changes—they’re tell-tale signs that something is off.
Be honest with yourself: how long has it been since you last checked the faucet parts? Over time, even high-quality components degrade. Catching these signs early can save you from bigger problems down the line.
When To Replace
Not all wear and tear means you need a replacement. If the damage is minor, cleaning the cartridge or valve may restore its function. However, deeper cracks or extensive corrosion are your cue to replace it.
If you’ve tried cleaning or lubricating the parts and the leak persists, replacement is the logical next step. You don’t want to waste time repeatedly fixing an issue that won’t go away. A new cartridge or valve can often solve the problem entirely.
Wondering how to know when enough is enough? If you’ve replaced washers and seals and still have a leak, it’s time to upgrade the core components. This ensures the faucet works like new.
Remember, solving a leaking faucet isn’t just about stopping the drip—it’s about restoring efficiency and saving water. Inspecting the cartridge or valve carefully brings you one step closer to a leak-free shower.
Replacing The Cartridge Or Washer
Replacing the cartridge or washer can fix a leaking shower faucet. This step is crucial because worn-out parts often cause leaks. A faulty cartridge or washer fails to create a proper seal, leading to water drips. By replacing it, you can restore the faucet’s functionality and stop water waste.
Choosing The Right Replacement
Identify the type of faucet you have before buying replacements. Check the manufacturer’s name, model, or part number. These details are often on the faucet handle or included in the manual. Take the old cartridge or washer to a hardware store for comparison. Ensure the replacement matches the size and type exactly.
If unsure, consult with store staff or read the product label. Choosing the wrong part can lead to further leaks or improper fitting. Always double-check before proceeding with the installation.
Installing The New Part
Turn off the water supply completely before starting the installation. Remove the old cartridge or washer carefully, noting its position. Insert the new part in the same orientation as the old one. Push it in firmly to ensure a tight seal.
Reassemble the faucet by reattaching the screws and handle. Tighten everything properly to avoid further leaks. Turn the water supply back on and test the faucet. If installed correctly, the leaking should stop immediately.
Reassembling The Faucet
Reassembling the faucet is the moment of truth. After identifying the leak, replacing worn-out parts, and cleaning components, this step ensures your shower faucet works smoothly without dripping. If you’ve ever felt frustrated after fixing something only to realize it’s still broken, this is your chance to get it right.
Securing The Handle
First, align the faucet handle properly with the stem. Don’t rush this step—misalignment can lead to a loose or wobbly handle later. If your handle uses screws, tighten them snugly using a screwdriver, but don’t overdo it. Over-tightening can strip the screws or damage the handle.
Double-check if the handle moves smoothly. Rotate it a few times to ensure everything is functioning correctly. Does it feel secure? If not, readjust it before moving forward. A well-secured handle is key to preventing future leaks.
Ensuring A Tight Fit
Check all connections to make sure they’re tight and properly seated. Pay close attention to the stem and any washers or seals you replaced earlier. Even a small gap can cause water to seep out and ruin your effort.
Test the tightness by gently turning the faucet on and off. Look for any leaks around the handle or base. If you notice water escaping, disassemble and inspect your parts again. A snug fit isn’t just about preventing leaks—it also gives your faucet a polished, professional look.
Before calling it done, ask yourself: “Would I trust this repair to last?” If the answer is yes, then congratulations—you’ve successfully reassembled the faucet! If you’re unsure, take a closer look and adjust until it feels just right.

Credit: www.youtube.com
Testing For Leaks
Sealing a leaking shower faucet is satisfying, but ensuring the fix worked is crucial. Testing for leaks after repairs lets you confirm everything is in place and functioning as it should. If not done properly, unnoticed drips can lead to higher water bills or even damage to your bathroom over time. Let’s make sure your efforts pay off by testing thoroughly.
Turning The Water Back On
Start by slowly turning the water supply back on. If you’re unsure where the supply valve is, it’s usually located near your main plumbing system or under the sink. Turn the valve clockwise to release water into the pipes.
Keep an eye on the faucet as you do this. It’s a good idea to turn the water on gradually to avoid sudden pressure buildup that might dislodge the repair work. Did you feel the anxiety kick in as you watch the faucet? That’s normal! Stay calm and let the process unfold.
Checking For Drips
Once the water is flowing, inspect the faucet carefully. Look for any drips or moisture around the handle, spout, or base. A dry faucet is your goal, but if you spot water, it’s time to revisit your repair.
To be thorough, place a dry paper towel or cloth underneath the faucet. Wait for a few minutes and check if it’s damp. This trick can help you spot even the smallest leaks that might be hard to see directly.
If there are no drips, try turning the faucet on and off several times. Does the water stop completely, or does it linger in small droplets? This step ensures the seals and washers are holding properly under regular use.
How confident do you feel about your repair now? Testing for leaks isn’t just about confirming a job well done—it’s about peace of mind knowing your shower is ready to use without any surprises.
Preventing Future Leaks
Preventing future leaks in your shower faucet is not just about fixing the immediate issue—it’s about adopting habits that keep your plumbing in great shape over time. A little effort now can save you from bigger problems and costly repairs later. Let’s dive into simple, actionable steps to ensure your shower faucet stays leak-free.
Regular Maintenance Tips
Don’t wait for a leak to start before paying attention to your faucet. Regularly check for signs of wear and tear, like loose handles or mineral buildup around the faucet. Catching these small issues early can stop them from turning into major headaches.
Keep your shower faucet clean by wiping it down weekly. Use a soft cloth and mild cleaner to remove soap scum and hard water stains. A clean faucet not only looks better but also works more efficiently.
Replace worn-out washers and O-rings as soon as you notice dripping. These tiny parts are affordable and easy to swap out, even for beginners. Ignoring them can lead to bigger problems, so it’s worth keeping spares on hand.
Monitoring Water Pressure
Excessive water pressure can strain your faucet and lead to leaks over time. Use a water pressure gauge to measure the pressure in your home. Ideally, it should be between 40-60 psi.
If the pressure is too high, consider installing a pressure regulator. It’s an inexpensive solution that can protect your entire plumbing system, not just your shower faucet. A properly regulated water flow also helps save water, benefiting both your wallet and the environment.
Pay attention to sudden changes in water pressure when using your shower. If the pressure seems inconsistent, it could indicate a deeper plumbing issue. Addressing it sooner rather than later can prevent damage to your faucet and pipes.
What habits can you start today to protect your shower faucet from future leaks? By sticking to these simple tips, you can enjoy a functional, leak-free bathroom for years to come.
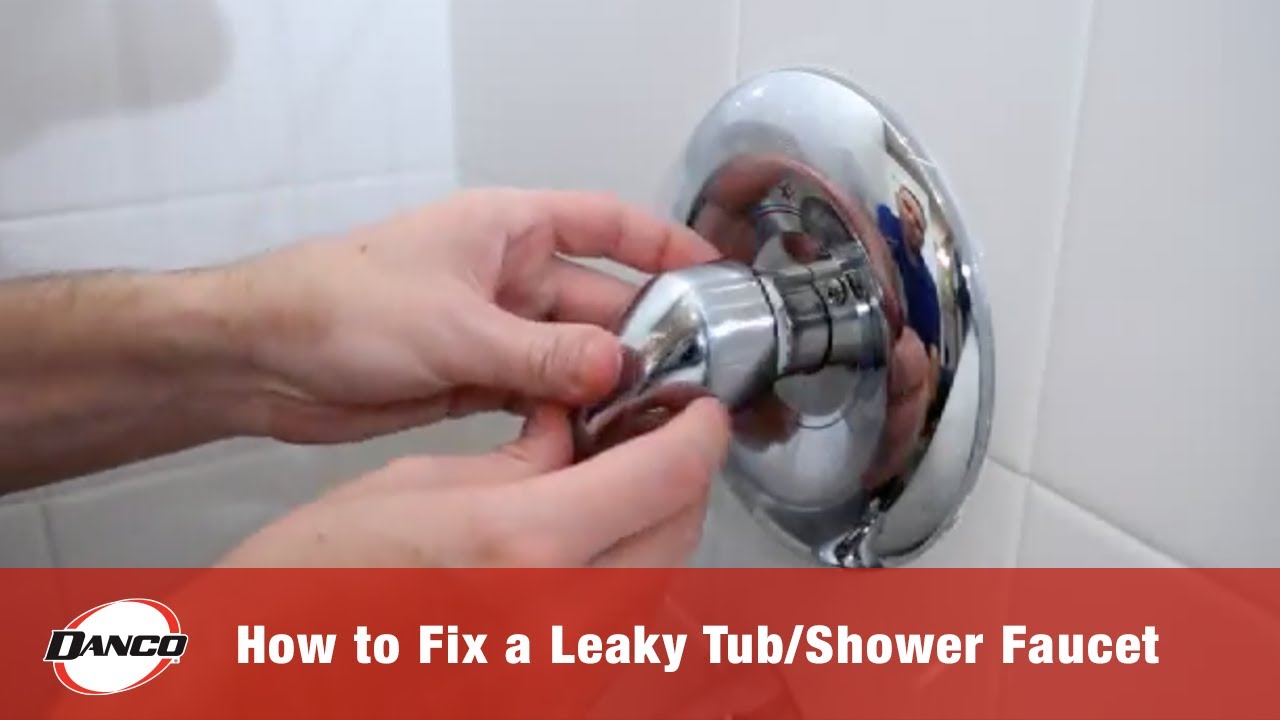
Credit: www.danco.com
Credit: www.homedepot.com
Frequently Asked Questions
How To Make A Shower Faucet Stop Dripping?
Turn off water supply and remove the faucet handle. Replace the worn-out washer, O-ring, or cartridge. Reassemble tightly.
What Do You Use To Seal A Shower Faucet?
Use plumber’s tape (Teflon tape) or silicone sealant to seal a shower faucet. Ensure proper application for a watertight seal.
How Do I Stop My Shower Tap From Leaking?
Turn off the water supply. Use a wrench to tighten or replace the washer, O-ring, or cartridge.
Why Is My Shower Faucet Dripping When Turned Off?
A dripping shower faucet likely indicates a worn-out washer, damaged valve seat, or faulty cartridge. Replace these components to fix it.
Conclusion
Sealing a leaking shower faucet doesn’t have to be difficult. With basic tools and patience, you can fix it yourself. Start by identifying the cause of the leak. Replace worn-out parts, like washers or cartridges, as needed. Always turn off the water supply before starting.
Test the faucet after repairs to ensure the leak is gone. Regular maintenance can prevent future leaks and save water. Taking quick action helps avoid bigger problems later. Follow these steps to keep your faucet working properly and your bathroom dry.
A little effort today can save you time and money down the road.