
To fix a toilet that wobbles side to side, slide firm plastic shims under the low spots on the base and snug the floor bolts. The most common cause is an uneven bathroom floor that leaves a gap under the porcelain rim.
Table of Contents
Why your toilet wobbles side to side
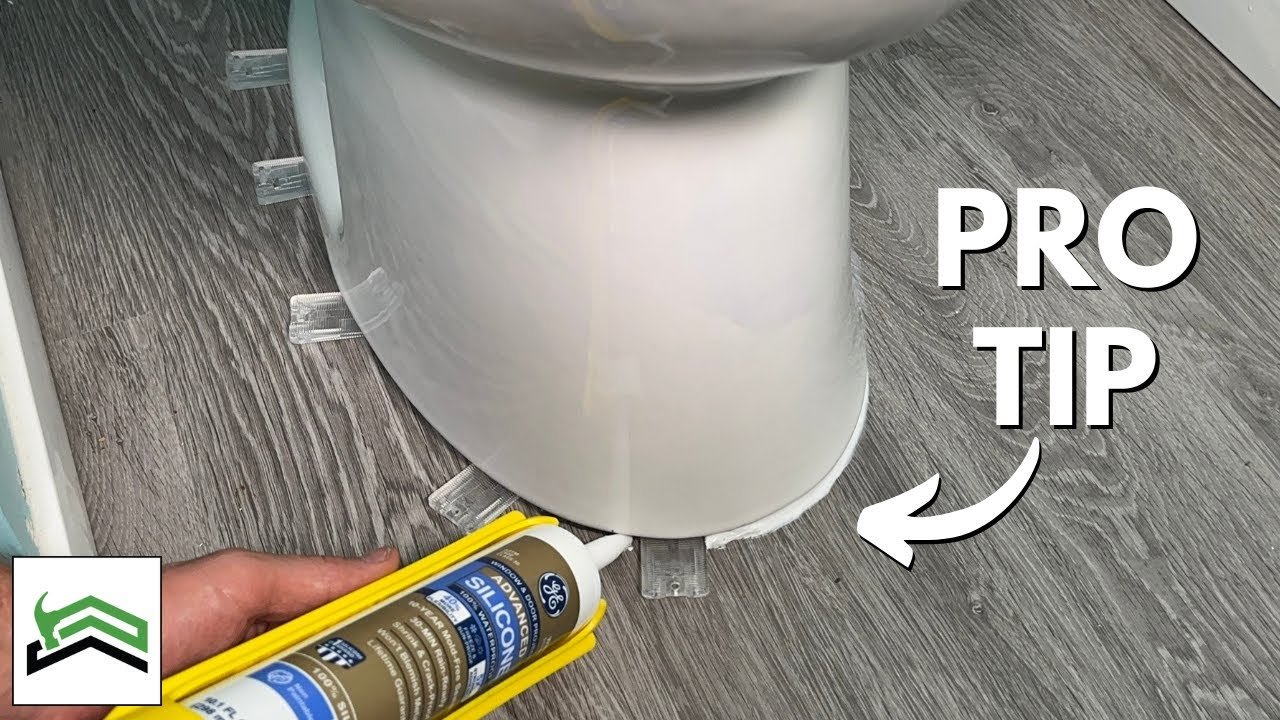
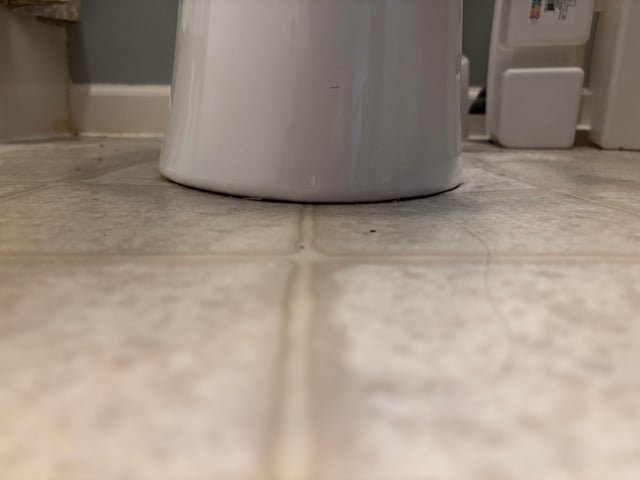
A moving toilet usually stems from three physical issues. First, uneven floor tiles or sunken vinyl leave pockets of empty space beneath the flat bottom of the fixture. Second, the two closet bolts securing the bowl to the floor drain flange can work loose over time from normal body weight shifting across the seat. Third, hidden water leaks can rot the wooden subfloor around the drainpipe, which causes the metal or plastic mounting flange to bend or snap. This issue isn’t for homes where the whole floor sags when you walk near the bowl; that points to broken floor joists underneath. If you notice a soft, spongy floor, stop using the bathroom and call a licensed carpenter or general contractor before touching the plumbing fixtures.
Snug the floor bolts
If the floor is completely flat, simply retighten the mounting hardware at the base. Pry off the two plastic bolt caps located on opposite sides of the bowl with a flathead screwdriver. If the toilet rocks, don’t tighten the bolts to bridge the gap; instead, use shims to support the base before gently snugging the nuts. Don’t wrench them down with heavy force. The trade-off is simple: tightening secures the base, but turning the nut too hard instantly cracks the brittle porcelain rim, which ruins the entire bowl. Once the nuts feel snug against their washers, push gently on the rim with your hand to test the stability. If the unit still rocks even a tiny bit, stop tightening immediately and move to shims.
Insert plastic shims
When an uneven floor creates an open gap beneath the fixture, shimming the base provides solid support. Gently push the toilet from side to side to locate the exact gap where the porcelain lifts off the floor. Slide hard plastic toilet shims directly into that void until they fit snugly against the bottom edge. Avoid soft wood shims, as bathroom moisture rots them quickly. Sit on the seat to verify that your full body weight doesn’t cause any movement. Next, use a sharp utility knife to score and snap the excess plastic flush with the outer rim. To keep the shims locked in place, run a neat bead of pure silicone caulk around the front and sides of the base, leaving a small opening at the back.
Rebuild the drain flange
If the bolts spin freely without tightening or pull straight up from the floor, the underlying drain flange is broken. This advanced fix requires shutting off the water valve, draining the tank completely, and unbolting the toilet to lift it off the floor. You must scrape away the old wax ring and install a metal repair ring over the damaged flange slots. If the subfloor around the pipe has rotted away from past leaks, this repair is worth the extra time and expense; otherwise, the new bolts will pull out again within days. When cutting drainpipes or rebuilding rotted framing feels beyond your skill, hire a licensed plumber.
What not to do
- Don’t use metal washers or coins as shims under the base, because the hard metal points focus pressure and crack the brittle china.
- Don’t caulk all the way around the base without leaving a dry gap at the rear. A full caulk seal traps leaking toilet water underneath the bowl, hiding serious subfloor rot until the floor collapses.
- Don’t sit or bounce on the bowl while tightening the mounting nuts. Adding your body weight can push the porcelain past its breaking point and snap the base ring completely.
How to stop it happening again
Proper installation methods keep your toilet stable and protect your subfloor over time.
| If you’re doing this | Do this instead | Why |
|---|---|---|
| Leaving a bare gap under the rim | Support the void with firm plastic shims | Porcelain will flex and snap under body weight without support |
| Tightening nuts with all your strength | Turn nuts only until snug, checking stability | Over-tightening shatters the base and costs a full toilet replacement |
| Caulking the entire perimeter of the base | Leave a two-inch uncaulked gap at the rear | Trapped water from a failing wax seal rots the hidden floor |
| Ignoring a loose bowl for months | Fix any minor rocking as soon as it starts | Rocking breaks the wax seal and spills waste under your tiles |
Frequently asked questions
Can a wobbling toilet cause a leak?
Yes, a rocking base almost always causes a water leak over time. The movement tears the soft wax ring between the toilet horn and the drainpipe. Once that seal breaks, dirty water and foul sewer gases seep across your subfloor every time you flush the handle.
Is it safe to use a toilet that moves side to side?
No, using an unstable toilet isn’t safe. The shifting movement strains the water supply connection, which can cause a leak. Furthermore, sudden shifts under adult body weight can crack the porcelain bowl into sharp, razor-like shards that cause severe physical injury.
What happens if I overtighten the toilet bolts?
You’ll crack the porcelain base of the toilet bowl. Porcelain is an extremely brittle material that can’t bend or flex under mechanical pressure. A cracked toilet base can’t be safely repaired or glued, meaning you must buy and install a whole new fixture.
Why do toilet shims keep sliding out from the base?
Shims slide out because they were installed without weight on the bowl or left uncaulked. The gap widens slightly whenever someone sits down, which loosens the wedge. Caulking the front and sides locks the plastic wedges permanently against the floor so they can’t wander over time.
How do I know if the toilet flange is broken?
Your flange is likely broken if the floor bolts spin freely without tightening or pull straight upward when pulled. You may also see the bolt tilt sideways inside the hole. This failure means the slotted mounting track on the drainpipe has snapped off entirely.
Final Thoughts
Once the base feels solid, apply a thin bead of bathroom-grade caulk around the bottom edge for a clean, professional finish. This prevents water from seeping underneath and keeps your floor protected. You’ll be glad you took the extra time to seal it, as it’ll keep your bathroom looking great for years.
Related guides
