
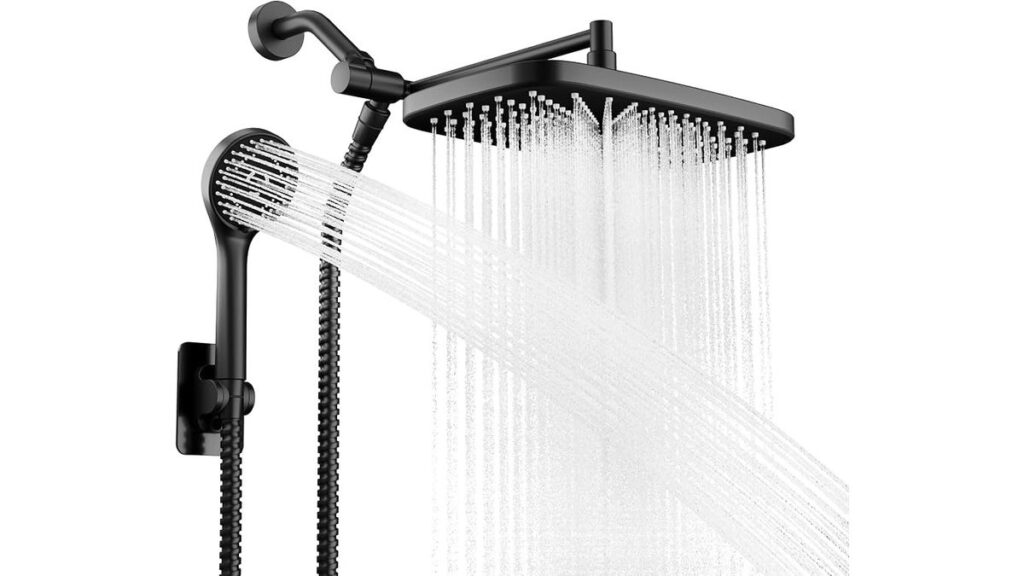
A handheld shower head with on off switch your ultimate guide to showering bliss delivers full water flow when you wash and cuts it to a slow trickle while you lather, saving water and keeping your set temperature steady. Standard models run between 1.5 and 2.5 gallons per minute depending on your local plumbing limits. This walkthrough covers thread sizing, leak-free installation, line pressure limits, and descaling routines.
Table of Contents
How the handheld shower head switch works
This tool is a detachable shower sprayer that connects to a flexible metal or plastic hose. It has a push button or toggle lever built right into the handle. That switch closes an internal valve to reduce water discharge to a thin drip while you soap up, shave, or wash a pet.
People often think shutting off the handle switch completely turns off the main plumbing line. It doesn’t. The main wall valves stay wide open, keeping line pressure trapped inside the flexible hose until you open the spray head again.
This tool is built for homeowners, renters, seniors, and anyone washing pets or cleaning shower stalls. It’s not for homes with ancient, brittle galvanized pipes behind the wall that might crack under pressure pulses. If your home runs on high water pressure, choose a metal-reinforced hose; if you have standard pressure, a basic vinyl hose works fine. The trade-off is simple: you get effortless control at your fingertips, but the trapped line pressure can cause cheap plastic hose fittings to burst if you leave the toggle closed for hours.
The basic method
Installing the unit takes about 15 minutes using basic hand tools and thread tape.
- Turn both the hot and cold water handles on your shower wall clockwise until they’re fully off.
- Unscrew the old shower head counterclockwise using an adjustable wrench, placing a cloth over the metal to protect the finish.
- Clean the shower arm threads with an old dry toothbrush to strip away old mineral crust and dried sealant.
- Wrap 2 to 3 clockwise layers of white PTFE thread seal tape around the male threads of the wall arm.
- Screw the new shower head mount or diverter bracket onto the taped wall arm by hand until snug, then add one-quarter turn with a wrench.
- Check that a black rubber washer sits flat inside each end of your shower hose, with 1 washer per connector.
- Hand-tighten the hex end of the hose to the wall mount and the conical end of the hose to the handheld spray wand.
- Turn the wall water valves back on, face the wand down toward the drain, and push the handle switch to test the flow.
The main judgment call happens when tightening the plastic bracket. Hand-tight is usually enough to seat the rubber washer; over-tightening with a metal wrench will crack plastic threads immediately. If your wall pipe feels loose inside the drywall, don’t force it. Stop and call a licensed plumber before you snap the pipe inside your wall.
Key numbers and settings at a glance
Match your household setup to the right hardware specs before mounting the unit.
| Situation | What to use | How long | What to watch for |
|---|---|---|---|
| Low water pressure home | 1.5 to 1.75 GPM head with aerating spray | Hose stiffness under low flow | |
| Washing dogs or pets | 72-inch stainless steel hose with pause button | Water temperature spikes when restarted | |
| Assisted bathing on shower bench | 84-inch kink-free hose with slide bracket | Sudden spray recoil when opening switch | |
| Standard household daily shower | 2.0 to 2.5 GPM head with trickle switch | Drip rate from safety relief port | |
| Hard water supply | Silicone anti-clog spray nozzles | White crust blocking the switch slide |
What separates good results from bad ones
Preparation and tape technique
Good results depend on proper thread preparation. Winding thread seal tape counterclockwise makes it bunch up and tear as you thread the bracket on, leaving bare metal that leaks. Wind it clockwise so the bracket smooths the tape down as it turns. One costly mistake is stacking 2 rubber washers into a single hose coupling to stop a leak. That crushes the rubber sideways, blocks the opening, and causes water to spray out the back of the nut.
Checking the hose line during use
Experienced users never leave the handle switch paused when they exit the shower. The handle toggle is designed to hold pressure for a couple of minutes during a wash cycle, not to serve as an overnight shutoff valve. Leaving it paused under active water mains strains the inner rubber hose tube and creates a burst risk that can flood your bathroom floor.
Common problems and quick fixes

Most issues trace back to loose washers, sediment buildup, or pressure shifts.
| What you notice | What it usually means | What to do first |
|---|---|---|
| Water leaks from hose swivel nut | Missing or slipped rubber washer | Unscrew hose and seat washer flat |
| Switch feels stuck or hard to push | Limescale crust inside toggle chamber | Soak wand head in pure white vinegar |
| Water gets scalding hot after unpausing | Water heater balance shift in dual-handle setup | Let water run toward drain for 3 seconds |
| Spray pattern sprays sideways | Mineral buildup inside individual spray holes | Rub silicone nozzles with your thumb |
| Water sprays around wall pipe joint | Thin or uneven thread tape | Remove bracket and re-tape with 3 full wraps |
Plumbing codes and flow standards
Shower fixtures sold in the United States must follow national efficiency limits. Under current federal energy regulations enforced by the Department of Energy, the maximum flow rate for shower heads is 2.5 gallons per minute at 80 pounds per square inch of water pressure. States like California set even tighter limits. Fixtures that earn the EPA WaterSense showerhead specification use no more than 2.0 gallons per minute while meeting strict spray force tests.
Plumbing standards also require pause switches to let a tiny trickle through rather than cutting the water to absolute zero. This built-in safety relief prevents sudden pressure shock waves from bursting the shower arm behind your tiled wall.
Maintaining the spray switch
Hard water minerals will eventually freeze the toggle mechanism. As soon as you notice the switch sticking or the spray holes shooting crooked, remove the wand from the hose. Submerge the entire spray head in a bowl filled with equal parts warm water and distilled white vinegar. Let it soak until the mineral deposits dissolve. Rinse it thoroughly with clean tap water, push the switch back and forth 5 times to clear internal passages, and screw it back onto the hose. This varies by model — check the label to ensure vinegar won’t tarnish specialty finishes like oil-rubbed bronze.
When to use a different approach
Skip the handheld pause wand if you have an unvented, tankless water heater with a high minimum activation flow. Pausing the water drops flow to zero, causing the burner to shut off immediately; turning it back on sends an icy shock of cold water through the line.
This unit is also wrong for open-concept bathrooms without a shower curtain, door, or lip. The flexible hose makes it too easy to spray water directly past the drain zone onto dry baseboards. In those layouts, stick with a fixed, downward-angled wall head.
Frequently asked questions

Can a shower pause switch break my water pipes?
No, normal home plumbing handles standard line pressure easily. The switch lets a small trickle pass through to prevent water hammer. But if your shower arm is heavily rusted or loose inside the wall, the backpressure can make existing pipe leaks worse.
Why does the water get hot after using the pause button?
Hot and cold water sit equalized in your pipes while the main handles stay open. Pausing the head can let hot water cross over into the cold pipe if your plumbing lacks balancing check valves. Point the spray head down for 3 seconds before resuming your shower.
How long does thread tape last on a shower mount?
Thread tape lasts for years if the joint isn’t moved. You only need to replace it when you unscrew the bracket to swap parts or fix a leak. Always remove old tape shreds completely before wrapping fresh tape.
Is it safe to leave the shower paused while running errands?
No, never use the handle button as a replacement for the wall knobs. The flexible hose and plastic handle aren’t designed to hold continuous line pressure when unattended. Always turn off the wall handles when you finish bathing.
What happens if I remove the flow restrictor?
Removing the flow restrictor increases water volume, but it voids manufacturer warranties and violates local water efficiency codes in many areas. Higher flow also drains your water heater storage tank much faster during daily showers.
Final Thoughts
Upgrading your bathroom routine shouldn’t be a headache, and you’ll love how much easier your morning feels with this simple change. Once you’ve tightened that final connection, turn on the water and enjoy your first customized rinse. You’ve earned a more relaxing start to your day, so go ahead and treat yourself.






