
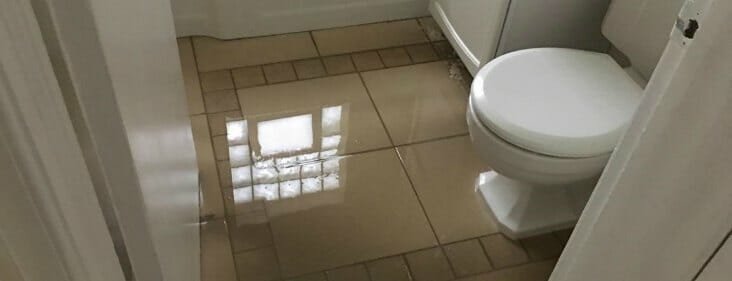
Learning how to clean up a flooded bathroom involves cutting power, stopping the flow, removing dirty liquid quickly, and drying the subfloor within 48 hours. The cleanup takes 2 to 4 hours of physical labor, but complete drying takes 24 to 48 hours. Doing this yourself costs very little if you own basic tools. The difficulty needs care due to electrical and slip hazards. You must have a shutoff valve key or clear access to the main water valve before starting.
Table of Contents
Supplies to clean your flooded bathroom

| Item | How much | Why it’s needed | A substitute |
|---|---|---|---|
| Wet-dry vacuum | 1 unit, 5-gallon minimum | Removes bulk water from floor fast | Mop and 3-gallon bucket |
| Thick bath towels | 6 to 10 towels | Soaks up water along baseboards | Cellulose cleaning sponges |
| Rubber gloves | 1 pair, heavy duty | Protects skin from dirty toilet water | none — don’t swap this |
| Liquid chlorine bleach | 0.5 cup per gallon water | Disinfects hard tile and stone surfaces | Commercial quaternary disinfectant cleaner |
| Box fan | 1 or 2 units | Moves high volumes of room air | Oscillating household stand fan |
| Dehumidifier | 1 unit, 30-pint minimum | Pulls moisture from walls and subfloor | none — don’t swap this |
Before you start
- Turn off the bathroom circuit breaker at your main panel if water touches any wall outlets or low baseboard heaters.
- Shut off the fixture supply valve behind the toilet or under the sink by turning it clockwise until it stops.
- Carry bath mats, laundry baskets, and paper products out of the room immediately so they don’t trap moisture against the flooring.
- Put on heavy rubber gloves and waterproof rubber boots before stepping onto the wet floor.
- Stop immediately and call a licensed plumber if dark sewage backs up through the shower drain or toilet base; don’t attempt home cleanup of raw municipal sewage.
Step by step
- Shut off the bathroom’s main water supply by turning the fixture’s oval valve handle clockwise until it seats firmly. Check that the flow stops completely by watching the leak point for 10 seconds.
- Put on your thick rubber gloves and safety boots to protect your hands and feet from contaminated water. You’re ready when your skin has no direct contact with the spill.
- Suck up standing water using your wet-dry vacuum, moving slowly across the floor from the doorway toward the leak source. Empty the vacuum canister into an unaffected toilet once it fills to its float shutoff point.
- Press dry towels firmly along every baseboard and under the vanity cabinet where the wet vacuum nozzle can’t reach. Pick up the towels once they’re fully saturated and replace them with dry ones.
- Wipe the entire hard floor surface with a mixture of 0.5 cup of liquid bleach per 1 gallon of cool water. Leave the wet solution on the non-porous floor for 10 full minutes to kill bacteria.
- Rinse the floor thoroughly using a clean sponge mop soaked in plain tap water to pull up the bleach residue. The floor is rinsed when no slippery soap or chemical film remains underfoot.
- Place one box fan on the floor pointing directly at the wettest corner, and close any exterior windows if it’s humid outside. Turn the fan to high speed to establish continuous air circulation.
- Set a portable dehumidifier in the center of the bathroom, close the bathroom door, and adjust the target humidity setting to 40 percent. Leave this running until the reservoir stops collecting water after 12 hours.
How to know it worked

The floor passes inspection when a dry paper towel pressed against the grout lines for 15 seconds picks up no moisture spots. Baseboards must remain flat; warped edges mean water soaked beneath the wood trim. Wood vanities should show no flaking paint, swelling at the seams, or dark damp patches around the base.
Drying within 48 hours stops mold growth on wet drywall and wood, according to the EPA mold cleanup guidelines. If you press a digital moisture meter against the drywall near the floor and get a reading above 15 percent, the wall cavity still holds water and requires another 24 hours of forced-air dehumidification.
If something goes wrong
| What happened | Why | What to do |
|---|---|---|
| Tile grout stays dark | Water penetrated under the tile bed | Run dehumidifier 24 hours longer |
| Baseboards begin to buckle | Wood absorbed trapped wall water | Pry off trim to dry wallboard |
| Musty smell after drying | Moisture reached the subfloor layer | Lift vinyl or call remediation pro |
| Bleach leaves white film | Solution dried without clear rinse | Mop with warm water and vinegar |
| Vacuum suction drops suddenly | Tank float valve engaged when full | Empty the tank and resume vacuuming |
How often to do this
This cleanup happens only after sudden plumbing failures or fixture overflows. The two things that change how often you face this are the age of your plumbing supply lines and your toilet maintenance habits. Braided stainless-steel supply hoses typically have a manufacturer-recommended service life of 5 to 10 years, but this varies by brand. Inspecting your toilet flapper, fill valve, and flexible supply lines regularly keeps small leaks from turning into emergency floods. Homes with high water pressure above 70 pounds per square inch wear out these fittings faster, requiring frequent inspections of every supply shutoff valve.
Frequently asked questions

Can I save a bath mat soaked in toilet water?
Yes, if the toilet held clean water before overflowing. Wash the mat immediately in your washing machine using hot water and a color-safe disinfectant. Throw the mat away if the water contained solid waste, because standard home laundry cycles rarely remove heavy pathogens trapped inside thick latex backings.
Why does the floor feel soft after drying?
Subfloor damage caused the softening. Water leaked through the floor joints and soaked the plywood or oriented strand board underneath your floor covering. Once wood subfloors swell and break down from water exposure, they lose structural strength. You must remove the floor finish and replace the rotted wood sections.
How long does a bathroom take to dry completely?
About 24 to 48 hours under proper conditions. This timeline assumes you keep a commercial dehumidifier running and run a fan directly across the floor. If you leave the room closed without active air movement or equipment, drying takes more than five days and leads to mold behind the baseboards.
Is it safe to run a vacuum through bathroom flood water?
No, never use a standard household vacuum cleaner on standing water. Standard vacuums cause immediate electrical shocks and short out their motors. Only use an appliance specifically rated as a wet-dry utility vacuum, plugged into an outlet protected by a ground fault circuit interrupter outside the wet zone.
What happens if water leaks through to the ceiling below?
Ceiling drywall will sag and eventually collapse under the weight of trapped water. Poke a small hole in the center of the damp ceiling spot using a screwdriver to drain the water into a bucket. Keep the hole open until the upstairs bathroom subfloor dries out completely.
Does it matter if I use warm or cold water with bleach?
Yes, you must use cool or cold water. Hot water can cause bleach to decompose more rapidly and release chlorine vapors, but it doesn’t spontaneously turn into salt and water while releasing gas. Cold water keeps the bleach stable and effective so it can sanitize contaminated tile surfaces properly.
Final Thoughts
Once the area is completely dry, take a moment to inspect your pipes for hidden cracks or loose seals. It’s a good idea to keep a bucket and spare towels in a nearby closet just in case. You’ll feel much more prepared if a small leak happens again in the future.
Related guides






