
A reliable shower mirror fogless for shaving works by matching the mirror’s surface temperature to the warm shower water or by using a chemical coating that forces moisture to form a flat sheet instead of tiny droplets. Heated water-chamber models clear the glass completely in about 5 to 10 seconds. Coated acrylic models work instantly upon contact with steam. This guide covers the physical differences between water-chamber and coated units, the exact mounting requirements for bathroom tile, and how to revive a failing anti-fog surface without damaging the reflective backing.
Table of Contents
How a fogless shower mirror works for shaving

Fog forms on standard glass because humid, warm air hits a cold surface. That sudden temperature drop forces moisture vapor to condense into microscopic beads of liquid. Those round beads scatter light in every direction, which destroys your reflection. A true anti-fog mirror stops this physical reaction in one of two ways.
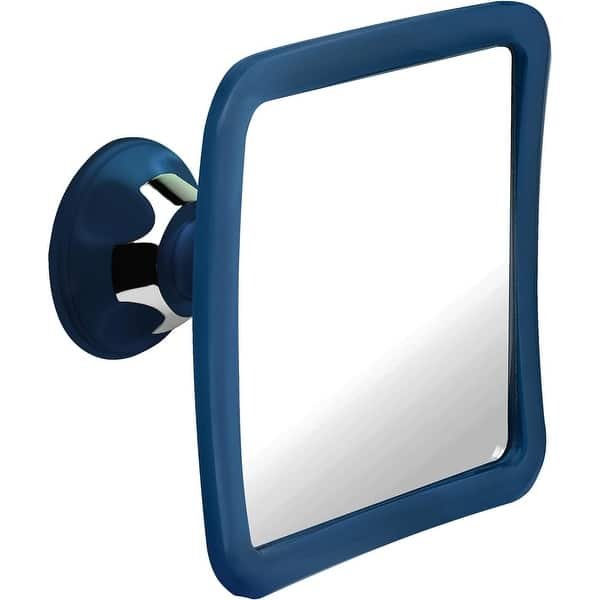
One design uses a rear reservoir. You fill this chamber with hot shower stream water right before shaving. The warm liquid heats the plastic plate from behind, raising the reflective face above the dew point of the room. Since the mirror is just as warm as the air, water vapor never condenses on it.
The second uses a factory-applied chemical film. This coating is hydrophilic, meaning it attracts water molecules and breaks their surface tension. Instead of forming round beads that scatter your view, incoming vapor flattens out into an invisible, continuous sheet of water. The reflection stays sharp while the shower runs.
These units avoid standard glass. They don’t. They’re molded from acrylic or polycarbonate to prevent shards.
The basic method
Proper mounting ensures clarity.
- Clean a flat, non-porous tile or glass section using 2 tablespoons of isopropyl alcohol on a clean cloth, then let the area air-dry for 2 minutes.
- Wet the suction cup base with 3 to 4 drops of water to create a tighter airtight seal against the tile.
- Press the suction cup firmly against the center of a single smooth tile, pushing out all trapped air before flipping the locking lever down. Don’t mount across grout lines.
- If your model uses a heated reservoir, unhook the mirror from its base bracket and hold it directly under the hot shower stream for 5 to 10 seconds until the back chamber fills completely.
- If your unit relies on a factory coating, ensure the surface is clean and free of soap residue, as the coating works automatically upon contact with steam.
- Mount the mirror at eye level and tilt the viewing angle down slightly so stray droplets drain toward the bottom edge.
If the surface looks beaded or cloudy, the reservoir water has cooled or the coating is compromised. If X happens and the reflection starts hazing over, splash warm water across the front plate immediately; if Y happens and it stays stubbornly fogged, empty and refill the rear reservoir with fresh hot water.
Key numbers and settings at a glance
Different shower environments require specific mirror designs and prep steps to maintain visibility.
| Situation | What to use | How long | What to watch for |
|---|---|---|---|
| Long, 20-minute hot shower | Water-chamber reservoir unit | Refill reservoir after 12 minutes | Water cooling in the back compartment |
| Quick 5-minute shave | Coated acrylic mirror | 2-second pre-rinse under warm tap | Dry spots where vapor scatters light |
| Textured or slate stone walls | Adhesive-backed mounting bracket | 24-hour adhesive cure before hanging | Suction failure on rough, porous stone |
| Hard water area (high mineral) | Coated acrylic with daily squeegee wipe | 3-second squeegee pass after use | Chalky white calcium scale spots |
| Unventilated small bathroom | Heated reservoir with anti-fog spray boost | 10-second hot water reservoir fill | Heavy dripping along the lower frame |
What separates good results from bad ones
Surface care and placement
Reflection quality depends on placement and handling. Mount the bracket completely out of the direct shower spray path. If constant, heavy water hits the mirror, it washes away shaving cream on your face and creates ripples on the reflection. Keep it 12 to 18 inches to the side of the main water stream. Experienced users never wipe the mirror face with a bare hand or a rough towel. Rubbing an acrylic surface with dry cloth grinds microscopic grit into the plastic, causing scratches that permanently blur the image.
Cleaning chemistry and order
Avoid ammonia-based glass cleaners. Ammonia strips factory hydrophilic coatings within seconds, ruining a brand-new unit permanently. If your unit begins losing its fog-free property, wipe it gently using 1 drop of mild liquid dish soap diluted in 1 cup of warm water, using only a soft microfiber cloth. Rinse it with clear water.
Common problems and quick fixes

Fixing blur or falls takes seconds.
| What you notice | What it usually means | What to do first |
|---|---|---|
| Mirror fogs after 5 minutes | Reservoir water has dropped in temperature | Empty the back chamber and refill with hot shower water |
| Heavy streaks block view | Soap residue dried on the front surface | Wash gently with dilute dish soap and rinse thoroughly |
| Suction cup falls off wall | Air leaked through textured tile or dirty grout | Clean tile with rubbing alcohol and move off the grout line |
| Hazy, distorted reflection | Factory protective film was left on plastic | Peel the clear plastic shipping film from the mirror face |
The rules that apply
Shower accessories must meet safety standards. The Consumer Product Safety Commission mirror regulations govern architectural safety glazing materials to prevent laceration injuries from broken glass in hazardous locations. Because standard glass shatters into sharp daggers, manufacturers construct these units from shatterproof acrylic, polycarbonate, or safety glass.
Electrical plug-in heated mirrors must adhere to strict National Electrical Code (NEC) standards regarding wet locations and GFCI (Ground Fault Circuit Interrupter) protection. If you plan to install a hardwired, electrically heated defogging mirror inside a shower stall, you can’t treat this as an everyday DIY job. Installing line-voltage wiring inside shower zones requires a licensed electrician who understands local building codes and moisture-sealing rules.
Keeping it clean and functional
Acrylic mirrors require gentle upkeep. After finishing your shave, empty the water reservoir completely so standing water doesn’t breed mildew or leave mineral deposits behind.
When a factory coating stops working—usually signaled by water beading instead of sheeting across the face—you don’t need to throw the unit away. Clean the plate with diluted dish soap, let it dry, and apply two pumps of commercial anti-fog spray or a thin film of basic glycerin shaving cream, buffing it lightly with a microfiber cloth.
When to use a different approach
A hanging shower mirror isn’t the best tool for every routine. Who this is NOT for: anyone who needs high-magnification glass (such as 10x or 15x) for detailed cosmetic work. Curved high-magnification acrylic creates heavy visual distortion at the edges when wet. For intricate grooming, dry-area vanity mirrors with direct LED ring lighting provide far superior detail.
Similarly, if your bathroom features rough, unsealed natural slate, porous tumbled marble, or small mosaic tiles with wide grout lines, standard suction cups will fail every single time. In those bathrooms, skip suction models entirely and choose an adjustable bracket that hangs directly over the shower head pipe, or mount a permanent rustproof stainless steel hook using marine-grade silicone sealant.
Frequently asked questions
Can I clean a shower mirror with regular glass cleaner?
No. Standard household glass cleaners contain ammonia or vinegar, which chemically degrade the soft acrylic surface and strip the thin anti-fog coating. Clean the mirror using only warm water and a tiny drop of mild, lotion-free dish soap applied with a soft microfiber cloth.
Why does my suction cup keep falling off the shower tile?
Suction cups fall when air enters the vacuum pocket through microscopic textures, limescale buildup, or recessed grout lines. Clean the tile with rubbing alcohol, moisten the rim of the suction cup with a few drops of water, and lock it entirely onto a single, perfectly smooth, non-porous tile.
How long does an anti-fog coating last on a mirror?
The lifespan of factory anti-fog coatings varies significantly based on the manufacturer and the frequency of cleaning. Once water starts beading on the surface, you must revive it periodically using a specialized anti-fog treatment spray.
Is it safe to leave water inside the reservoir between showers?
No. Leaving warm water sitting inside an enclosed plastic chamber encourages bacterial growth, mold spores, and stagnant odor. Mineral salts also drop out of standing hard water, crusting the internal walls with scale. Dump the chamber completely upside down immediately after every shaving routine.
What happens if I wipe the mirror with a dry towel?
Wiping dry acrylic drags fine dust particles across the soft plastic face, leaving permanent micro-scratches that create a cloudy haze over time. If moisture droplets block your reflection, either splash the face with warm water or use a soft rubber squeegee blade with light pressure.
Final Thoughts
Choosing the right setup makes your morning routine feel much smoother. Once you’ve picked a style that fits your bathroom’s layout, you won’t have to deal with blurry reflections anymore. Take a look at your shower wall today to see which mounting method works best, and you’ll be ready for a clearer shave tomorrow.
