
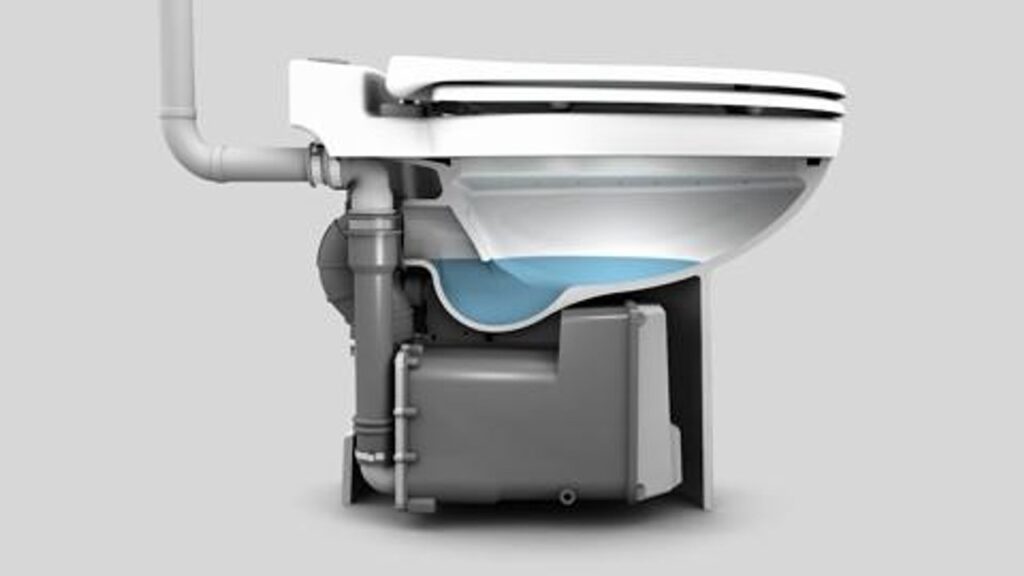
A full review saniflo sanicompact 48 shows this tankless macerating toilet pumps waste up to 9 feet vertically or 100 feet horizontally while fitting into tight spaces under 20 inches deep. It delivers a solid dual-flush system using 1 or 1.28 gallons per flush. Below you’ll find exact installation rules, discharge limits, and mechanical fixes that short product summaries leave out.
Table of Contents
Why choose the Saniflo Sanicompact
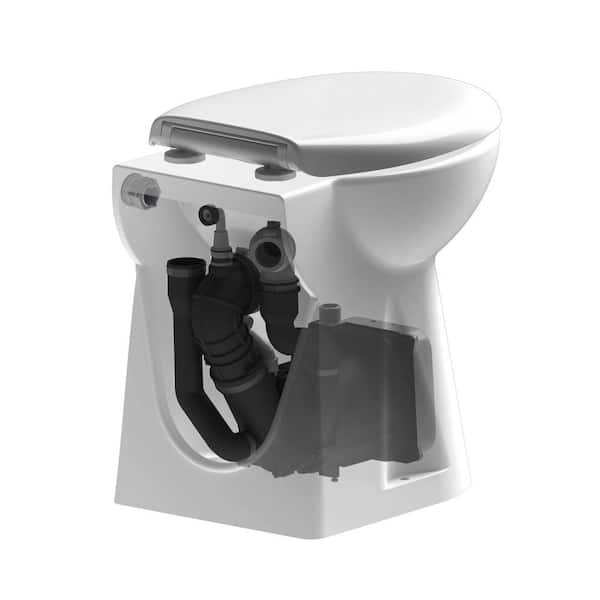
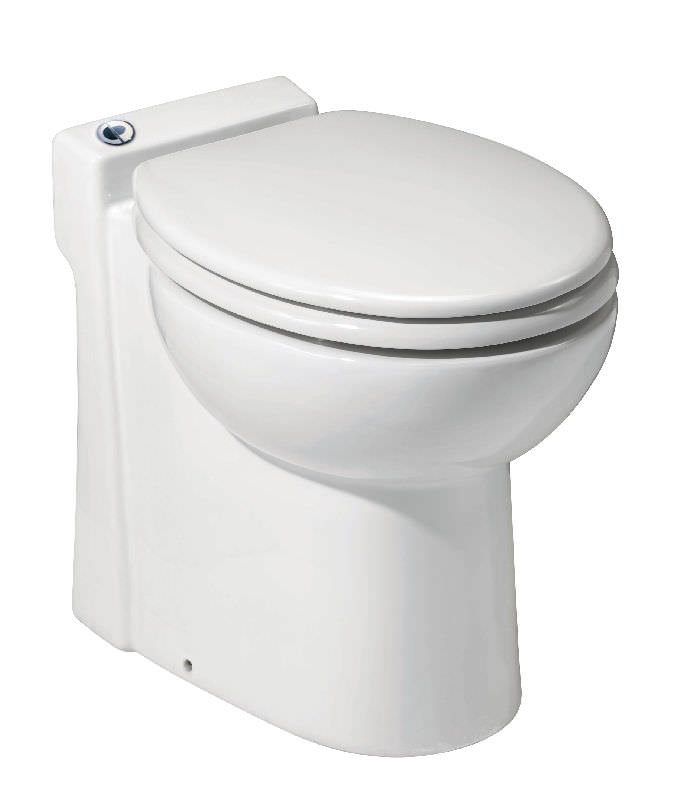
This fixture combines a ceramic toilet bowl and an internal grinder pump into one piece. It doesn’t use an external water tank behind the seat. Instead, a built-in switch runs an internal electric motor that grinds waste with stainless-steel blades and drives it out through a 1-inch pipe. It’s built for home half-baths, basements, and under-stair closets where gravity drainage lines sit too far away.
People often assume it connects to a standard sink, shower, and toilet all at once. In reality, it only accepts waste from its own bowl and a single washbasin. Flushing feminine products, wipes, or dental floss is a mistake people actually make, and it costs them a significant amount in motor repairs or a voided warranty. The motor spins at high speeds, so tough synthetic fibers quickly jam the cutting blades and stop the impeller.
The basic method
Installing this unit requires careful plumbing and electrical steps to run safely:
- Place the fixture on a level floor, leaving at least 12 inches of clearance on each side for servicing.
- Connect the 1/2-inch cold water supply line directly to the solenoid valve, ensuring your water system delivers at least 25 pounds per square inch of dynamic pressure.
- Glue the factory-supplied rubber elbow to the rear discharge port using a 1-inch PVC discharge pipe.
- Install a full-port check valve within 12 inches of the discharge outlet to stop waste from flowing back into the pump.
- Connect the optional sink drain pipe to the rear rubber inlet using a 1-1/4-inch PVC line, ensuring the sink trap sits at least 6 inches above the floor.
- Plug the 3-prong grounded plug into a dedicated 120-volt, 15-amp GFCI electrical outlet.
Never connect the main power cord directly into raw wall wiring. If you lack a dedicated GFCI outlet nearby, call a licensed electrician.
Key numbers and settings at a glance
Operating conditions change depending on how your home plumbing lines are laid out.
| Situation | What to use | How long | What to watch for |
|---|---|---|---|
| Standard short flush | Eco button (1.0 GPF) | 10 to 15 seconds | Incomplete rinse on sticky solids |
| Full bowl flush | Normal button (1.28 GPF) | 15 to 20 seconds | Water level rising near the rim |
| Sink drainage | Gravity drain to rear inlet | Drains with faucet use | Water backing up in the basin trap |
| Vertical climb over 6 ft | 1-inch schedule 40 PVC | Continuous run | Motor straining or hum pitch dropping |
What separates good results from bad ones
Vibration Control and Alignment
Securing the base properly prevents noise from traveling through the floorboards. Tighten the floor-mounting screws firmly, but don’t overtighten them, as brittle vitreous china can crack around the mounting holes. A level base stops standing water from pooling inside the pump housing after a flush cycle finishes.
Discharge Layout and Pipe Elbows
The pump’s motor must never push waste against sharp corners. Using two 45-degree elbows instead of a single 90-degree bend keeps the fluid moving freely and lowers backpressure on the internal seals. The trade-off for its compact depth is working in cramped rear quarters, meaning you must glue and clamp every discharge fitting securely before sliding the unit against the finished wall.
Common problems and quick fixes
When the motor or flush cycles show unusual behavior, these basic checks resolve the problem quickly.
| What you notice | What it usually means | What to do first |
|---|---|---|
| Motor hums but won’t spin | Foreign object trapped in blade | Unplug unit and clear the macerator |
| Water slowly fills the bowl | Solenoid valve stuck open | Clean or replace the inlet water valve |
| Unit flushes on its own | Water leaking through solenoid | Turn off isolation valve to confirm leak |
| Unit fails to turn on | Tripped GFCI or loose plug | Reset the wall outlet button |
| Sluggish pump cycle | Limescale buildup inside pump | Run descaler solution through the bowl |
Installation Codes and Standards
Plumbing and electrical codes strictly govern self-contained macerating fixtures. The unit must meet standard US sanitary guidelines, and you can confirm proper design compliance through the IAPMO product listing directory. These standards ensure the internal motor can’t pull dirty waste back into your home drinking lines.
The National Electrical Code requires you to plug this unit into an isolated ground-fault circuit interrupter receptacle. Running an extension cord to power the macerator breaks building codes and voids the product’s safety rating. If your local building department requires a plumbing permit for new fixtures, hire a licensed master plumber to inspect your drain vent lines.
Keeping the Pump Clear and Maintained
Routine cleaning prevents mineral deposits from sticking to the blades and internal rubber float switch. Pour 1 to 2 quarts of dedicated macerator descaler into the bowl, leave it alone for 2 hours, and flush twice to rinse the tank. Never use bleach or heavy chemical drain openers, because harsh chemicals eat through the flexible rubber drive seals within months.
This unit holds up well for everyday home use, but limescale depends heavily on local water hardness. A noticeable sign that cleaning is due happens when the motor runs a few seconds longer than usual to clear clear water. If you notice persistent foul smells, check the air admittance vent valve on your sink connection to ensure sewer gases aren’t slipping past the seal.
When to use a different approach
This compact fixture isn’t for high-traffic public restrooms or families with small children who may drop plastic toys into the bowl. If you need a toilet that serves a complete bathroom with a bathtub or shower, use a freestanding macerating pump system like the standard Saniplus instead.
If your home already features an accessible 3-inch or 4-inch gravity drain pipe directly below the subfloor, install a standard gravity-flush toilet. A standard toilet avoids mechanical grinding completely, works during electrical outages, and costs less to service over time.
Frequently asked questions
Can you use normal toilet paper in this unit?
Yes, you can use regular household toilet paper. The blades shred normal bath tissue easily during the flush cycle. You must avoid thick wet wipes, paper towels, and facial tissues, because these materials contain synthetic bonding threads that wrap tightly around the steel cutter shaft.
Why is my unit vibrating loudly during a flush?
Foreign debris is likely caught inside the cutting blades. If hard plastic or sanitary products enter the bowl, they wedge between the blades and unbalance the motor shaft. Unplug the power cord immediately, turn off the water, and pull the obstruction free before running it again.
How long does the macerating cycle run?
About 10 to 20 seconds depending on the chosen flush setting. The short eco-cycle runs for roughly 10 seconds, while the full cycle runs slightly longer to flush solid waste completely. This varies by model and dynamic water pressure, so check the label for your exact serial series.
What happens if the power goes out?
The toilet won’t flush without electricity. Because this model uses a built-in electric pump and a solenoid valve instead of a gravity water tank, it can’t move waste until wall power returns.
Is it safe to pour boiling water down the bowl?
No, boiling water damages the internal pump seals. For cleaning, use only room-temperature water mixed with mild liquid soap or a manufacturer-approved macerator descaler.
Final Thoughts
If you’re still unsure about your plumbing layout, it’s a good idea to chat with a local pro before you start. They’ll help you confirm your pipe slope and venting needs so you don’t run into any surprises. Once you’re set, you’ll find this unit’s a reliable way to add a bathroom anywhere.
Related guides
- Low Flow Water Pump Guide: Efficiency and Installation Tips
- Ove Decors Shower Doors Review: Pros, Cons, and Installation
- Cost of Walk in Shower Installation: Price Breakdown and Factors






