
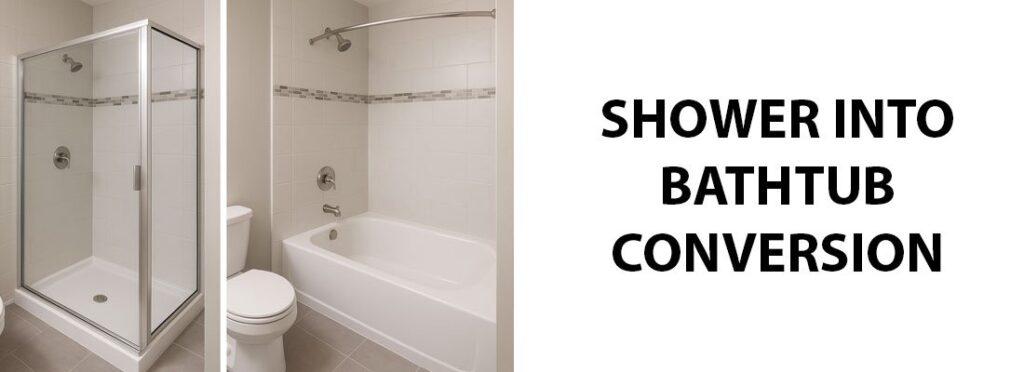
Reviewing bath fitter shower prices your ultimate guide to cost and value helps homeowners compare custom acrylic liner costs against traditional tile remodeling. A custom acrylic shower install generally costs several thousand dollars, depending on wall height, plumbing upgrades, and accessory selections. This guide breaks down the financial factors, structural requirements, installation workflow, and long-term upkeep considerations that quick estimates leave out.
Table of Contents
Understanding bath fitter shower costs

A custom acrylic shower system is a non-porous liner made from thermoformed acrylic sheets that fit directly over an existing tile or cast iron shower base and surround. Homeowners choose this method to refresh a worn bathroom in a single day without demolishing existing walls. The material prevents water infiltration because it eliminates traditional grout lines that crack over time.
A common misconception is that acrylic inserts merely cover up active mold or rotting framing without consequence. In reality, sound backing is mandatory. If your subfloor has dry rot or the wall behind the existing surround shows structural water damage, technicians can’t simply cap it with acrylic. The structure underneath must remain structurally sound, dry, and level for the adhesive to bond permanently.
Who this isn’t for: budget shoppers seeking a quick sub-$1,000 cosmetic fix, or historical home restorers wanting authentic natural stone surfaces.
The basic method
Installing an acrylic shower follows an exact sequence to ensure watertight adhesion:
- The technician measures the existing shower enclosure using specialized measuring tools, recording height, depth, and drain locations to an eighth of an inch.
- The technician cleans the original surface with an industrial degreaser and scuffs the tile surface using 80-grit abrasive pads to ensure mechanical bonding.
- The technician removes the old plumbing fixtures, including the shower valve trim and drain flange, using a pipe wrench and screwdriver.
- If a new valve body is required, a licensed plumber solders or crimps copper or PEX connections to meet municipal code requirements.
- The installer applies structural adhesive in continuous vertical beads spaced approximately 4 inches apart across the substrate walls.
- The single-piece acrylic wall unit is pressed firmly against the adhesive, using hand rollers to eliminate air pockets.
- The installer applies a 3/8-inch bead of mildew-resistant silicone sealant along every seam, joint, and perimeter edge.
- The new fixtures, showerhead, and grab bars are fastened securely into pre-drilled backing boards.
The single judgement call that separates a good result from a bad one is checking the substrate for moisture content with a pinless moisture meter before applying adhesive. Trapping dampness behind the liner causes foul odors and loosens adhesive sheets. If supply pipes need moving or the subfloor is decayed, hire a licensed general contractor or master plumber before starting installation.
Key numbers and settings at a glance
How your bathroom’s starting condition changes project scope and turnaround times is essential to understand when planning a remodel.
| Situation | What to use | How long | What to watch for |
|---|---|---|---|
| Standard alcove replacement | Single-piece acrylic surround | 6 to 8 hours | Proper adhesive curing before water contact |
| Tub-to-shower conversion | Low-threshold acrylic base with wall system | 1 to 2 days | |
| Damaged plaster substrate | Moisture-resistant greenboard replacement | Adds 4 to 6 hours | Complete structural drying before liner installation |
| Cracked plumbing valve | Pressure-balanced mixing valve | 2 to 3 hours | Local code compliance and shut-off access |
| Corner neo-angle shower | Multi-piece corner acrylic system | 6 to 8 hours | Wall squareness and door alignment |
What separates good results from bad ones
Preparation and mechanical fit
A quality installation depends heavily on initial surface preparation. Technicians must strip away all old silicone caulk, soap scum, and peeling paint down to the solid base. If walls aren’t square, the installer must scribe and trim the sheet edges so the unit sits plumb without tension. Forcing a tight panel into an uneven corner causes surface oil-canning and popping noises when you step inside.
Order of operations and chemical cure
Sealing requires strict discipline. Applying silicone over dusty or damp edges prevents the compound from bonding, which invites hidden leaks. Experienced installers wait until the structural adhesive has grabbed completely before running finish beads around the base perimeter. Once the silicone is tooled, don’t use the shower for at least 24 hours. Turning on hot water prematurely compromises the chemical cure of the silicone sealant.
Common problems and quick fixes

Even durable acrylic systems can develop issues if installed improperly or cleaned with harsh chemicals.
| What you notice | What it usually means | What to do first |
|---|---|---|
| Spongy feeling underfoot | Void in the bedding compound under base | Contact the installer to inject supportive foam under warranty |
| Dull or hazy finish | Surface scratched by abrasive cleaners | Buff lightly using an acrylic-safe polishing compound |
| Musty odor near base | Sealant failure along the bottom seam | Strip old silicone, disinfect joint, dry thoroughly, and recaulk |
| Water leaking into room | Shower door sweep misaligned or worn | Loosen mounting screws, readjust sweep downward, and retighten |
Regulatory standards and safety codes
Shower renovations must comply with regional building regulations. The International Code Council publishes the International Residential Code (IRC), which governs minimum shower dimensions, ventilation, and plumbing rough-ins. Under IRC Section P2708, finished shower compartments must have a minimum interior area of 900 square inches and must be capable of encompassing a 30-inch diameter circle.
If you’re converting a tub to a walk-in shower, a licensed plumber must modify the trap and drain line beneath the subfloor to prevent overflow hazards. Always verify permit requirements with your municipal building department before undertaking plumbing alterations.
Long-term shower maintenance
Acrylic liners are engineered for easy cleaning because grime can’t penetrate the non-porous material. Clean the surfaces weekly with warm water and a neutral liquid dish soap or a mild cleaner approved specifically for acrylic. Apply cleaners using a soft microfiber cloth or yellow cellulose sponge.
Never clean the liner with abrasive scouring powders, bleach, or stiff bristle brushes. These materials scratch the surface glaze, leaving it dull and susceptible to dirt retention. Inspect the perimeter silicone caulking every six months. If you notice cracking, peeling, or black spotting, strip the compromised silicone completely, treat the joint with isopropyl alcohol, and reseal it with pure silicone.
When to use a different approach
An acrylic liner is the wrong choice if your bathroom walls have severe structural sagging or active termite damage; you must tear the assembly down to the studs instead. Homeowners seeking custom, niche-heavy architectural designs with irregular floor plans should opt for traditional mud-bed tile work. Also, if you plan to sell a luxury property where high-end buyers expect natural marble or handcrafted ceramic tile, an acrylic insert can look out of place and diminish return on investment.
Frequently asked questions

Can you use bleach to clean an acrylic shower?
No, you shouldn’t use chlorine bleach or ammonia on acrylic surfaces. Harsh chemicals degrade the acrylic’s glossy topcoat over time, which causes discoloration, micro-cracking, and permanent dullness. Stick to mild dish soap or cleaners formulated specifically for acrylic fixtures.
How long does an acrylic shower installation take?
Most standard liner installations take between one and two days. A direct overlay into an existing, plumb alcove takes about six to eight hours. If your project involves tub-to-shower conversion or significant plumbing changes, expect the work to span two full business days.
Why does my acrylic shower floor flex when I step on it?
Acrylic shower floors flex when the subfloor is uneven or the installer didn’t apply enough mortar or supportive foam bedding beneath the base. This gap allows the material to bend under human weight. Left unaddressed, ongoing movement can crack the drain seal.
Is it safe to install grab bars on an acrylic surround?
Yes, grab bars are safe to install if they anchor directly into solid wood blocking behind the acrylic wall. Never fasten safety bars into the acrylic skin alone using drywall anchors, as the plastic can’t support dynamic body weight during a slip or fall.
What happens if water gets behind an acrylic shower liner?
Water trapped behind a liner can’t evaporate quickly, which leads to mold growth, bad odors, and eventual subfloor rot. If you suspect water is seeping behind the wall panel, stop using the shower and call a certified technician to inspect the perimeter seal.
Final Thoughts
Choosing the right upgrade shouldn’t feel overwhelming. Before you commit to a contractor, gather at least three local quotes to see how different materials fit your budget. You’ll feel much more confident in your decision once you’ve compared your options side-by-side, so don’t hesitate to ask plenty of questions during your consultation.
Related guides
- 33 Qt Water Bath Canner Guide: Large Batch Preserving Tips
- 3 Handle Tub and Shower Faucet Guide for Bathroom Upgrades
- Basco Shower Doors Reviews: Expert Verdict on Quality and Fit






