
Independent buyers show that horow smart toilet reviews report strong bidet performance and reliable automatic flushing, but frequent setup trouble with narrow plumbing rough-ins. Most units deliver warm water washing, a heated seat, and dual flushing using roughly 1.28 gallons per flush. You’ll get luxury features without luxury brand pricing, but you must measure your bathroom accurately before buying. This guide breaks down owner feedback, installation requirements, common mechanical faults, and how these units compare against standard toilets.
Table of Contents
How the Horow smart toilet functions
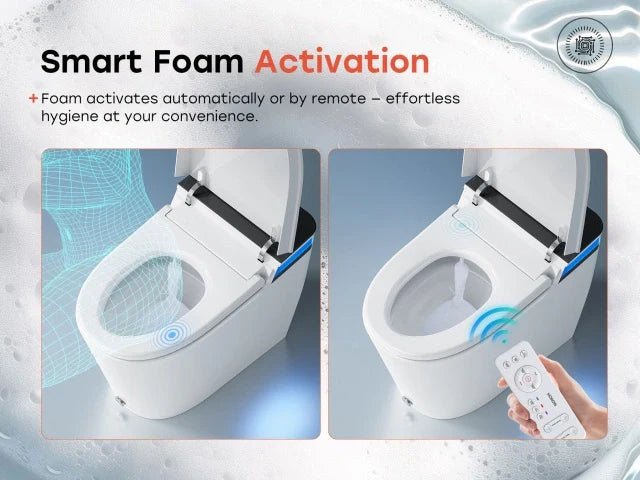
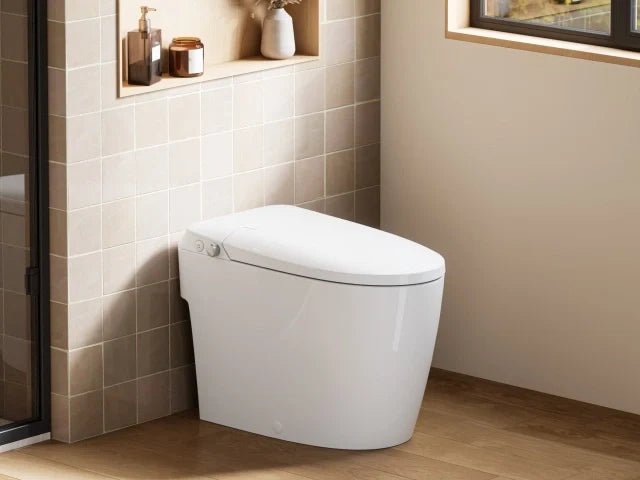
A Horow smart toilet combines a vitreous china toilet bowl with an electronic bidet seat in a single, skirted base. It’s designed for homeowners who want hands-free flushing, warm water cleansing, and warm air drying. A common misconception is that these units run solely on your home’s water pressure. In reality, an electric solenoid valve and an internal pump control the flush cycle, which is why the toilet needs a constant 110V to 120V electrical connection to operate its automated features.
This setup isn’t for households that lack a nearby ground-fault circuit interrupter (GFCI) outlet. The skirted sides create a smooth, modern look that hides the trapway, but they also leave very little hand room behind the porcelain during setup.
The basic method
Installing or replacing an integrated unit requires careful sequencing to avoid cracked ceramic and slow leaks.
- Turn off your water supply valve completely by rotating it clockwise until it stops, then flush the old toilet to empty the tank.
- Disconnect the old water line using an adjustable wrench and remove the mounting nuts from the floor flange.
- Clean the existing closet flange thoroughly with a putty knife, removing all remnants of the old wax ring.
- Verify your rough-in distance measures exactly 12 inches from the finished wall to the center of the floor bolts.
- Press a fresh wax ring firmly onto the bottom outlet horn of the toilet bowl.
- Lower the heavy toilet straight down over the flange bolts; this unit weighs over 90 pounds, so lift carefully with a helper.
- Hand-tighten the nuts onto the floor bolts, then add a 1/4 turn with a wrench. Don’t overtighten, or the ceramic will crack.
- Connect the braided stainless steel hose to your shut-off valve, plug the electrical cord into your GFCI outlet, and open the water supply valve fully.
The single judgement call that separates a clean install from a messy one is floor leveling. If your floor slopes even slightly, shim the base before tightening the bolts, because rocking will break the wax seal and cause hidden leaks beneath the tiles. If you don’t have an outlet within three feet of the bowl, hire a licensed electrician to run a dedicated GFCI line.
Key numbers and settings at a glance
Plan your bathroom space and electrical supply around these operational benchmarks.
| Situation | What to use | How long | What to watch for |
|---|---|---|---|
| Rough-in check | Tape measure from wall to bolt center | 1 minute | Must measure at least 12 inches from drywall, not baseboard |
| Dedicated power | 110V-120V GFCI outlet (15A circuit) | Continuous | Keep cord away from wet floor areas |
| Bidet wash cycle | Rear or front oscillating nozzle setting | 90 seconds per wash | Water pressure level set too high initially |
| Dryer cycle | Warm air nozzle on medium temperature | 3 to 5 minutes | Incomplete drying if you skip pre-patting with paper |
| Full flush cycle | Dual-flush valve (1.28 gallons) | 4 to 6 seconds | Weak discharge if dynamic water pressure is below 35 PSI |
| Nighttime use | Integrated bowl LED light | Stays on via sensor |
What separates good results from bad ones
Proper prep and clearance
Experienced plumbers always measure from the finished wall, not the baseboard trim. Horow units sit very flush against the back wall. If your rough-in measures 11.5 inches instead of 12 inches, the heavy porcelain skirt will hit the drywall before the drain pipe meets the floor flange. If the space is tight, choose a model with an open-back skirt; if your wall clearance exceeds 12.5 inches, pick the fully concealed skirt for easier exterior cleaning. Check the water pressure using a gauge on your supply stop before mounting the unit; smart bidet valves need adequate flow to complete a siphon flush properly.
Safe electrical routing
Never run an extension cord across the bathroom floor to reach a distant outlet. Water splashes will trip the breaker or cause a short. Route the power cord behind the skirted porcelain, keeping it elevated with adhesive wire clips so it stays dry. Leave the internal control board alone; modern integrated toilets use pre-sealed electronics, and tampering with internal wiring voids the warranty.
Common problems and quick fixes
When smart functions fail, the issue usually relates to water pressure or power sensors rather than broken hardware.
| What you notice | What it usually means | What to do first |
|---|---|---|
| Weak or incomplete flush | Dynamic water line pressure is too low | Open the supply valve completely or clear the inlet mesh filter |
| Remote control doesn’t trigger unit | Unpaired frequency or dead AAA batteries | Replace batteries and hold the stop button to re-pair the remote |
| Spray nozzle extends but no water flows | Mineral scale is clogging the nozzle tips | Soak nozzle tip in warm water and brush away hard deposits |
| Auto-flush triggers randomly | Proximity sensor lens is smudged | Wipe the infrared sensor window on the base with a soft microfiber cloth |
| Seat heater stays cold | Eco-mode or standby mode is active | Press seat temp button on the remote to wake the heating element |
Bathroom safety and water efficiency
Plumbing fixtures must comply with standard municipal building codes across North America. To verify efficient water consumption, check that your model displays the EPA WaterSense label, which limits high-efficiency toilets to a maximum of 1.28 gallons per flush. Electrical bidet components must carry recognized safety certifications such as UL 1431 or cUPC standards.
The National Electrical Code (NEC) requires bathroom convenience receptacles to have GFCI protection to guard against electrical shock near water fixtures. If your bathroom wiring dates back several decades and lacks a grounded outlet box near the toilet, call a licensed electrician. Never modify the factory-grounded three-prong plug supplied with the toilet.
Maintenance and nozzle care
Clean the exterior ceramic weekly using mild, non-abrasive dish soap and water. Never pour harsh chemical bowl cleaners or bleach into an integrated unit, because harsh fumes corrode internal seat sensors and degrade the rubber valve seals inside the base.
To clean the spray wand, press the manual nozzle-clean button on the side panel to extend the wand without spraying water. Gently wipe the stainless steel tube with a soft cloth dipped in diluted white vinegar to remove mineral buildup. Clean the inline water mesh filter regularly; you’ll find it threaded inside the brass water inlet adapter. Turn off the water valve, unscrew the fitting, rinse the small screen under a sink faucet, and thread it back into place.
When to use a different approach
An integrated Horow smart toilet is the wrong choice for rental homes. Landlords rarely permit tenants to drill new tile or install dedicated electrical circuits near the plumbing stack. In a rental, buy a standalone non-electric bidet attachment instead.
Homes fed by low-yield private wells or gravity-fed storage tanks with low water pressure should also avoid tankless smart models. These toilets lack a elevated gravity tank to force water down the trapway, relying instead on municipal supply pressure. In low-pressure homes, install a traditional gravity-flush toilet paired with an add-on heated bidet seat.
Frequently asked questions

Can you flush a Horow smart toilet without power?
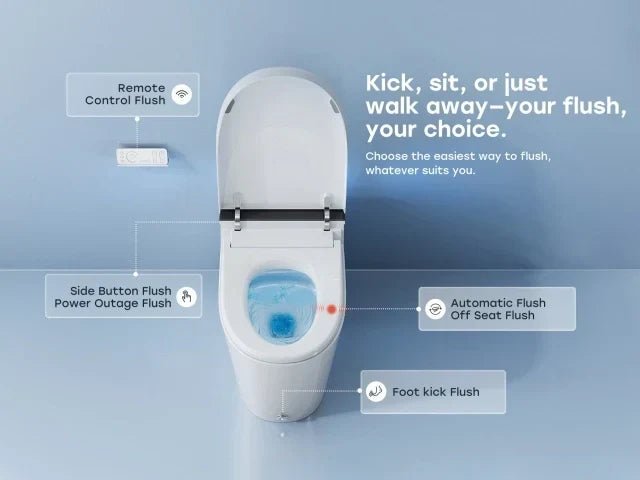
If your home loses power, you can still clear the bowl by pressing this emergency flush button.
How long does the Horow bidet warm water last?
About 40 to 60 seconds of continuous warm water is typical. Horow models use a small instant-heating ceramic core. If you run a continuous wash cycle past one minute, the water temperature will gradually drop toward the ambient groundwater level.
Is it safe to leave the heated seat on all day?
Yes. The seat heating element uses an internal thermostat that regulates surface temperature and prevents overheating. You can keep it active constantly, or select the built-in eco-mode to reduce power draw when nobody sits on the unit.
Why does the toilet beep when I walk past?
The proximity sensor detects motion within roughly three feet and prepares the bowl for use. If it chirps too often, lower the sensor’s detection range using the remote control, or switch the lid to open manually instead.
What happens if the bidet nozzle gets stuck out?
Turn off the side power switch on the base. Gently push the wand back into its housing with clean fingers. Clean any accumulated lime scale off the wand surface before powering the unit back on.
Final Thoughts
If you’re still unsure about making the switch, it’s a good idea to chat with a local plumber about your bathroom’s specific layout. They’ll help you confirm if your pipes are ready for an upgrade. Once you’ve got the green light, you won’t regret the extra comfort these modern seats provide.






