
You can finish a toilet tank fill valve replacement a comprehensive guide walks you through in about 30 to 45 minutes using an adjustable wrench, a sponge, and a standard replacement valve. Most modern gravity-flush toilets use an adjustable valve that sets the water level between 1/2 inch and 1 inch below the tank’s overflow pipe. Doing this yourself prevents hundreds of gallons of clean water from leaking down the drain each week. This guide covers removal, height measurements, and adjustments to stop running or whistling.
Table of Contents
Understanding the tank fill valve

A fill valve controls the flow of fresh water into your toilet tank after each flush. It sits on the left side of the tank and connects directly to your home’s water supply line through an opening in the porcelain base. When you push the flush handle, the tank empties, dropping the float attached to the valve. This movement opens an internal seal that refills the tank and sends a small stream down the overflow tube to replenish the bowl’s water trap.
The basic method
- Turn the shutoff valve behind the toilet clockwise until it stops, then flush the toilet and hold the handle down for 5 seconds to empty the tank.
- Press a dry car sponge against the bottom of the tank to soak up the remaining 1 inch of pooled water, squeezing it into a small bucket until the porcelain is dry.
- Place a shallow tray under the water supply connection, then loosen the supply line coupling nut from the bottom of the valve shank using channel-lock pliers.
- Unscrew the plastic mounting locknut securing the old valve to the tank base by turning it counterclockwise, then lift the old assembly straight up out of the tank.
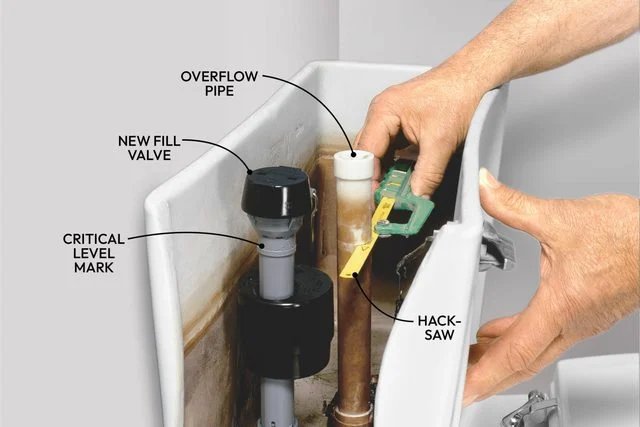
- Twist the threaded shank of the new valve to adjust its overall height so the critical level mark sits at least 1 inch above the top of your tank overflow tube.
- Slide the rubber shank washer onto the new valve base with the beveled edge facing down toward the tank hole, then push the shank through the bottom opening.
- Hand-tighten the plastic locknut onto the shank beneath the tank, then give it an extra 1/4 turn with pliers; don’t tighten further or the porcelain will crack.
- Clip the black refill tube to the top of the overflow pipe, reattach your water supply line, and turn the shutoff valve counterclockwise to test.
The critical decision rule: if the rubber shank washer sits flat against the inside tank floor without dirt underneath, tighten it strictly by hand; if water drips from the bottom nut during the fill test, turn the nut only 1/8 turn at a time until the drip ceases.
Key numbers and settings at a glance
Use these dimensions and adjustments when fitting your replacement assembly to different toilet designs.
What separates good results from bad ones
Proper height and float clearance
Getting a clean seal starts before you thread a single nut. Always adjust the valve height before installation to ensure the tank lid fits properly. Measure your overflow pipe height while the tank is empty. The critical level mark molded on the valve body must sit at least 1 inch above the top edge of the overflow tube to satisfy health codes. Rotate the valve body so the float arm swings freely without touching the porcelain wall, the flush lever arm, or the flapper chain.
Proper torque on plastic threads
Tighten plastic components carefully. Metal wrenches can strip plastic threads and cause leaks. Experienced installers spin the plastic nut up the shank until it touches the outer porcelain, then use their fingers to achieve a firm grip. Only use pliers if your hand strength leaves a tiny weep, and stop immediately once the water holds. Keep the valve body straight with your other hand while tightening so the bottom rubber gasket doesn’t twist out of shape.
Common problems and quick fixes
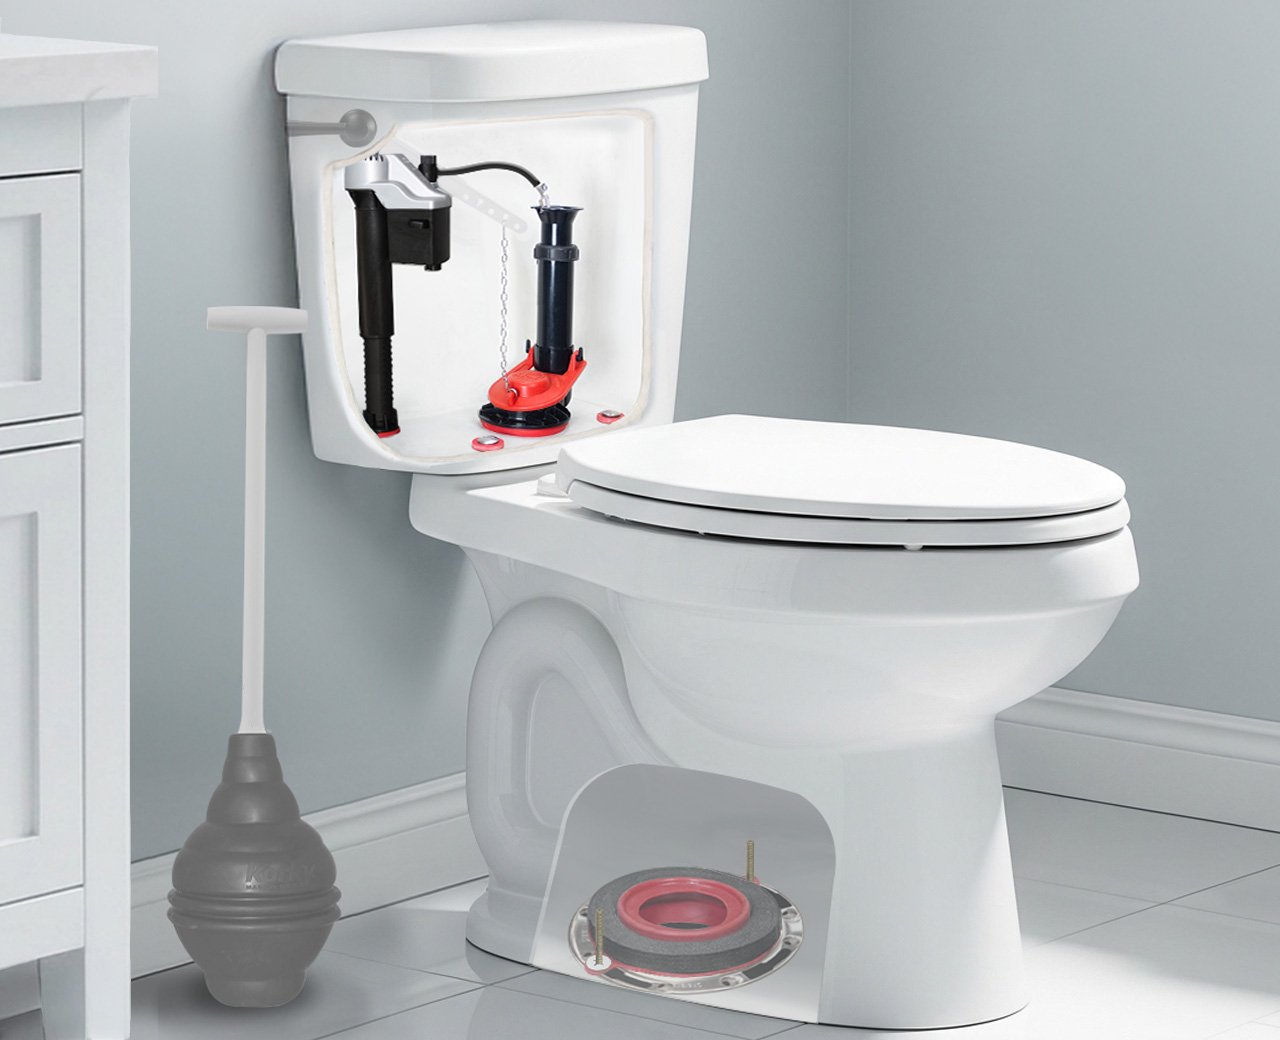
Check these specific points if the toilet doesn’t fill or shut off as expected after installation.
| What you notice | What it usually means | What to do first |
|---|---|---|
| Water runs continuously into the overflow tube | Float adjustment screw is set too high | Turn the plastic adjustment screw counterclockwise 2 turns |
| Slow drip from the shank underneath the tank | Rubber gasket pinched or locknut loose | Snug the locknut 1/8 turn with pliers |
| Loud squealing or whistling while filling | Debris caught inside the top valve seal | Pop off the valve cap and flush line for 5 seconds |
| Bowl water level sits unusually low | Refill tube aimed outside the overflow pipe | Push the tube firmly into the rim clip over the pipe |
The rules that apply
Plumbing codes require an air gap between your clean domestic water supply and the dirty water inside a toilet tank. ASME A112.19.5 sets the standard for anti-siphon fill valves. This ensures dirty tank water can’t backflow into your drinking water pipes.
This varies by model — check the label on your replacement unit for its specific critical level indicator line. If your municipal code mandates specific water-consumption limits, ensure the new valve lets you tune the tank volume to match your toilet bowl’s rated gallons per flush.
Keeping it working afterwards
Once your new valve is installed, inspect the floor around the base of the toilet tank twice during the first 24 hours. Mineral deposits from hard water gradually settle inside the upper diaphragm chamber over time. If your water flow drops to a slow trickle, shut off the angle stop, pull off the top twist cap of the valve, and place a cup over the open stem. Turn the shutoff on slightly for 5 seconds to blow out loose sand or pipe scale, then snap the cap back on.
Check the water line annually to confirm it stays 1/2 inch to 1 inch below the overflow rim. You don’t need chemical cleaners inside the tank; in fact, drop-in chlorine bleach tablets degrade the rubber seals within months and ruin your new valve parts.
When to use a different approach
This guide isn’t for people with commercial pressure-assist tanks or wall-hung hidden cistern systems. Pressure-assist toilets use a sealed, heavy steel or plastic pressure vessel inside the tank that holds compressed air; replacing parts on these systems requires dedicated high-pressure cartridges and carries a risk of physical injury if opened improperly.
Wall-hung toilets require removing the wall access plate to reach proprietary flush cassettes that don’t accept standard universal valves. If your home has rigid copper supply lines with no flex, you’ll need a tube cutter or an updated flexible braided-steel line rather than trying to bend the old pipe into a new valve base.
Frequently asked questions
Can I replace a fill valve without turning off the main water?
Yes, if the small shutoff valve on the wall behind the toilet turns completely and stops the water. If that individual wall valve leaks, turns infinitely, or fails to shut off the flow, you must close the main water valve to the house before loosening any tank parts.
Why is my new fill valve making a loud humming sound?
The shutoff valve beneath the tank isn’t opened all the way, or your home water pressure is running too high. Open the wall stop fully. If the sound remains, partially turn the adjustment screw on the valve cap to slightly decrease the flow rate through the diaphragm.
How high should the water level sit inside the tank?
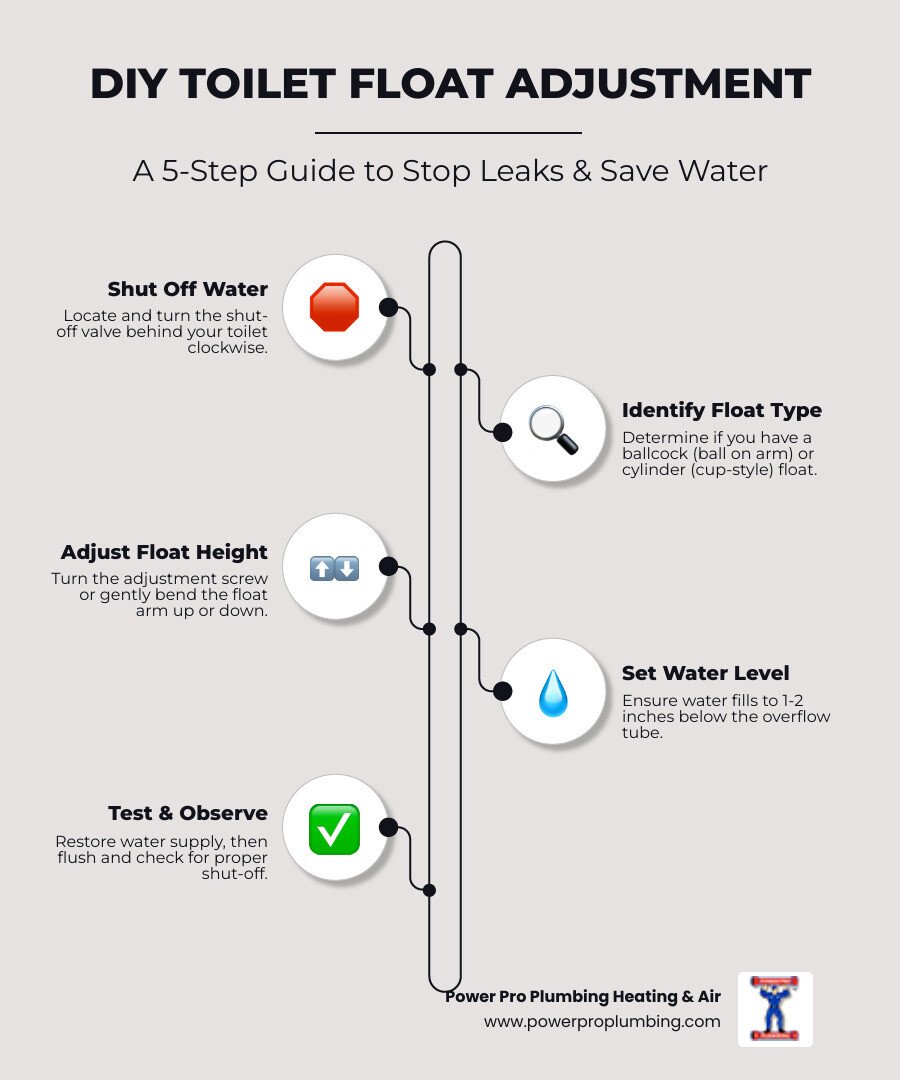
The water line should sit between 1/2 inch and 1 inch below the top opening of the overflow pipe. If the water level is too close to the rim, minor waves will trip an endless drain cycle; if it sits too low, your toilet won’t flush completely.
Do I need to use thread sealant tape on the shank threads?
No, never use thread sealant or plumber’s putty on the plastic shank threads. The water is stopped entirely by the rubber washer inside the bottom of the tank. Putting tape on the exterior plastic threads prevents the locknut from tightening square against the porcelain base.
What happens if the refill tube is pushed too far down the pipe?
The refill tube will siphon water directly out of the tank and down the drain continuously. The flexible black tube must clip securely to the top of the overflow pipe so its opening is positioned above the water level inside the pipe.
Final Thoughts
Once you’ve finished, flush the toilet a few times to make sure everything’s working smoothly. If you don’t hear any hissing or see water trickling into the bowl, you’ve done a great job. Keep an eye on the tank over the next day, and you’ll save plenty on your water bill.






