
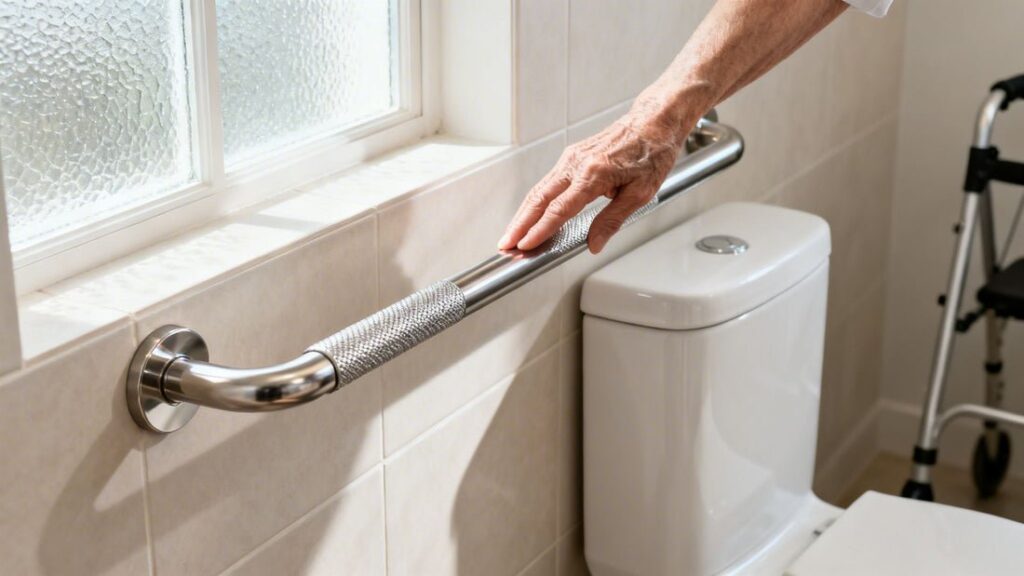
Bathroom grab bars for elderly your guide to safety and stability start with mounting standard 1.25-inch to 1.5-inch diameter metal bars into wall studs at a height of 33 to 36 inches above the floor. A secure install supports 250 pounds of downward force without slipping. This guide covers how to choose solid wall mounts, fix loose hardware on tile, and arrange bars for toilets and walk-in showers.
Table of Contents
Choosing grab bars for elderly bathroom safety

A grab bar is a heavy-duty safety rail bolted directly into wall framing to prevent falls during transfers. It gives older adults firm leverage when sitting down, standing up, or stepping across a wet tub edge.
A common misconception is that a heavy towel bar works just as well. Towel bars use small set screws anchored only into fragile drywall. When someone slips and grabs a towel bar, it pulls out instantly. A real safety bar uses solid stainless steel or brass tubing. It connects to the wood framing inside the wall with structural screws. The physical mechanism requires mechanical anchoring to the wall studs because drywall alone crumbles under sudden shock loads. If a stud sits right where you step, choose a standard bar; if your wall only has hollow gaps, you must use hollow-wall toggle bolts rated for heavy loads.
The basic method
- Locate the wood wall studs behind the tub or toilet using an electronic stud sensor, marking both edges of each 1.5-inch wide stud with a pencil.
- Hold the grab bar against the wall at your chosen height—typically 33 to 36 inches from the floor—and check it with a 12-inch bubble level.
- Mark the mounting holes through the bar flanges directly onto the wall, ensuring at least two holes per flange line up with the center of a stud.
- Drill 1/8-inch pilot holes through the tile and into the wood, using a carbide-tipped masonry drill bit at slow speed to keep the tile from cracking.
- Apply a ring of waterproof silicone caulk around the back edge of each mounting flange to stop water from leaking behind the wall.
- Drive 2.5-inch number 10 stainless steel wood screws through the mounting flange directly into the wood studs until the flange sits tight against the wall.
- Snap or twist the decorative flange covers over the mounting plates to protect the screws from daily shower spray.
The single judgement call that matters is screw depth into structural wood. If a screw bites into soft drywall or misses the center of the stud, it will pull loose under body weight. When drilling through thick porcelain tile or running into hidden plumbing lines, stop immediately and hire a licensed general contractor.
Key numbers and settings at a glance
Choosing the right bar size and placement depends on the user’s space and needs.
| Situation | What to use | How long | What to watch for |
|---|---|---|---|
| Beside standard toilet | 32-inch horizontal bar | 33 to 36 inches off floor | Clearance past toilet paper roll |
| Walk-in shower entrance | 18-inch vertical bar | 4 inches inside entry door | Door swing path hitting bar |
| Tub back wall | 36-inch or 42-inch horizontal bar | 33 to 36 inches above tub rim | Centering between two wall studs |
| Acrylic tub surround | Bar with hollow-wall anchor kit | 24-inch straight bar | Flexing or cracking of plastic surround |
| Wet shower wall | Textured or peened finish bar | 24-inch angled or horizontal bar | Soap film making smooth metal slick |
What separates good results from bad ones
Preparation and Layout Order
Experienced installers test user posture before drilling a single hole. Have the person sit on the toilet or stand in the shower, then mark where their hand naturally reaches for support. Working in reverse—mounting a bar where it looks balanced on the wall—forces an older adult to stretch awkwardly while off balance. Use low-tack painter’s tape on tile to mark the spot, which keeps drill bits from wandering across the glossy surface.
Fastener Integrity and Clearances
Check the backing before tightening down the hardware. A common mistake is using smooth drywall anchors instead of mechanical toggles when studs aren’t reachable. Drywall anchors shear off under sudden dynamic weight, costing hundreds in wall repairs after a fall. Leave 1.5 inches of open space between the wall surface and the bar. That gap lets hands wrap completely around the rail without trapping fingers against the wall if a slip happens.
Common problems and quick fixes

When a bar feels loose or tiles begin to split, address the connection right away.
| What you notice | What it usually means | What to do first |
|---|---|---|
| Bar wiggles when pulled | Mounting screws missed the wall stud | Remove bar and install structural toggle anchors |
| Hairline crack in tile | Drill bit ran too fast without water cooling | Seal crack with silicone; remount away from crack |
| Rust spots around flange | Regular steel screws used instead of stainless | Replace all hardware with grade 304 stainless steel |
| Suction bar falls off wall | Air leaked through textured tile or grout lines | Discard suction bar and install a permanent bolted bar |
Official Safety Standards for Handrails
Building and accessibility regulations require verified structural strength for grab hardware. The ADA Standards for Accessible Design specify that grab bars must withstand a vertical and horizontal load of at least 250 pounds without twisting or breaking. The federal guidelines also require an outside diameter between 1.25 inches and 2 inches, providing an easy grip for arthritic hands.
Commercial setups must follow these ADA dimensions strictly. While private homes don’t have to follow commercial codes, following these clearance standards keeps family members safe. If your bathroom walls contain structural metal studs or concrete blocks instead of standard wood framing, hire a certified accessibility technician to anchor the bars correctly.
Maintaining Wall Anchors and Grip
Check grab rails regularly by giving them a firm, sharp pull downward and outward. If the bar shifts or creaks, the fastener has begun working free from the substrate. Wipe the metal down weekly with mild liquid dish soap and warm water. Avoid using harsh bleach, abrasive scouring pads, or acid-based cleaners; these strip the protective coating off stainless steel and create rough, pitted surfaces.
Inspect the silicone bead around the wall flanges annually. If the caulk shrinks, peels, or shows black mildew, scrape it out with a plastic blade and apply fresh kitchen-and-bath silicone to prevent hidden dry rot inside the wall framing.
When to use a different approach

This approach isn’t for renters who can’t drill into bathroom tiles, or people using fiberglass shower units without wood backing. If your lease bans drilling holes, skip the wall-mounted rails and use a free-standing toilet safety frame that clamps to the bowl bolts.
For thin fiberglass enclosures with wide hollow gaps behind them, wall screws will crush the fiberglass shell. Instead, use a floor-to-ceiling tension pole installed near the tub edge. The trade-off is clear: tension poles take up more floor space, but they provide safe transfers without cracking fragile tub surrounds.
Frequently asked questions
Can suction cup grab bars be trusted?
No. Suction cup grab bars rely entirely on an airtight surface seal that naturally degrades over time. Changes in room temperature, soap residue, and textured tile break the vacuum seal unexpectedly, causing the bar to pull away from the wall when bearing full body weight.
What is the best height for bathroom grab bars?
Standard grab bars should sit between 33 and 36 inches above the finished floor. This matches federal accessibility standards and aligns comfortably with average adult hip height, allowing users to push downward with their arms without straining their shoulders.
Is an angled grab bar better than a horizontal one?
It depends on user mobility. A horizontal bar gives the most leverage for pulling up from a seated position, while an angled bar supports both sitting and standing along an inclined arm motion. However, angled bars allow hands to slide along the slope if grip strength fails.
What diameter grab bar is easiest to hold?
A bar with a 1.25-inch outside diameter works best for smaller hands or weak grip strength caused by arthritis. Bars measuring 1.5 inches work well for larger hands, but anything thicker than 2 inches prevents fingers from closing completely around the metal rail.
Do grab bars have to go into wall studs?
Yes. Grab bars must be anchored into structural blocking or wall studs to safely support the required 250-pound load. Standard plastic drywall plugs will fail under the dynamic load of a falling person. Securing at least one end of the bar directly into a solid wood stud is always the safest option.
Related guides
- All Bathroom Outlets Not Working: How to Reset Your GFCI
- Bathroom Remodel No Payments for Two Years: How It Works
- Bathroom Fan With Humidity Sensor: How to Choose and Install






