
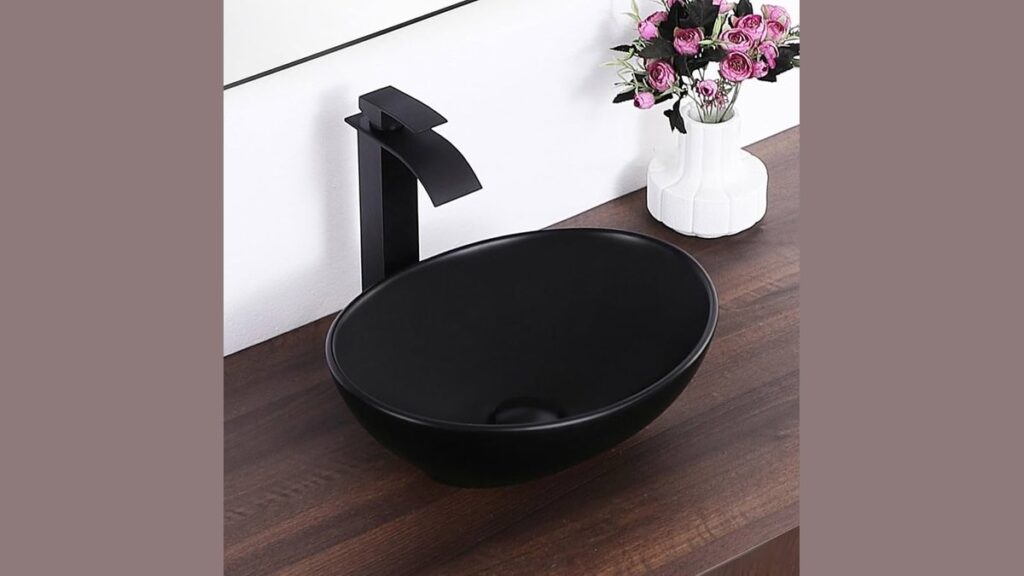
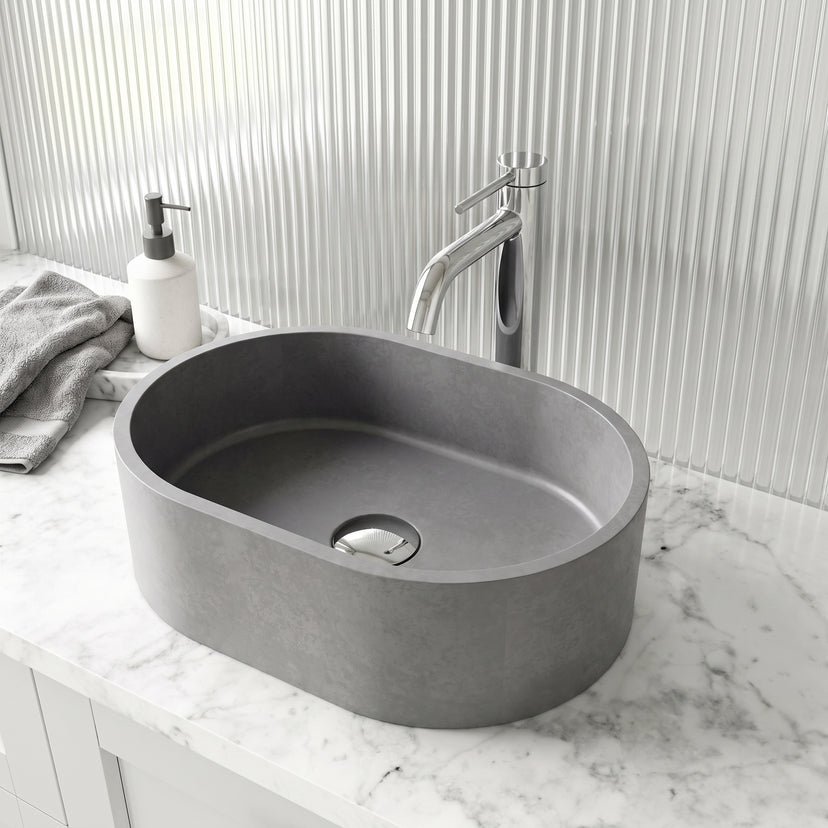
Clean lines, thin edges, floating profiles, and geometric basins represent the primary bathroom sink shapes and styles that define modern design. These basins typically feature rim thicknesses between 6 and 10 millimeters, deep charcoal or matte white finishes, and wall-mount or semi-recessed mountings. Choosing the right layout requires understanding drain placements, faucet pairings, and counter clearances that standard product photos leave out.
Table of Contents
Modern bathroom sink shapes and styles

Modern sinks drop traditional heavy rims in favor of clean architecture. Today, these basins serve as functional visual anchors in residential bathrooms, focusing on sharp geometry like rectangles, pill-shapes, and organic ovals. Homeowners choose them to save visual space and eliminate hard-to-clean trim.
A frequent misconception is that every modern sink demands a large bathroom. Thin-profile designs actually free up usable counter area because their walls measure under half an inch thick, unlike traditional rolled ceramic rims that take up several inches.
The primary trade-off comes down to durability versus profile: ultra-thin mineral composite edges look sharp, but they chip faster under heavy direct impacts than standard glazed vitreous china. If you prioritize easy cleaning over sculptural style, pick an integrated undermount rather than an above-counter vessel.
The basic method
Installing and sizing a contemporary basin requires precise measurements before roughing in plumbing.
- Measure your counter depth; a standard 21-inch vanity requires at least 4 inches of clearance behind the basin for a deck-mounted faucet.
- If wall-mounting, install horizontal 2×6 wood blocking between your wall studs at 32 inches above the finished floor before closing the drywall.
- Cut the countertop opening using the paper template from the manufacturer; trace the inner cut line, not the basin outer edge.
- Position the sink in the cutout, checking with an 18-inch spirit level across both the width and depth.
- Apply a 1/4-inch bead of 100% silicone sealant beneath the mounting rim or basin contact points.
- Install the drain body through the sink hole, tightening the bottom locknut by hand plus one-quarter turn using channel locks.
- Connect the 1-1/4-inch P-trap directly to the threaded tailpiece, setting the trap seal level without bending the slip joints.
- Let the silicone cure for 24 hours before running the water.
The single judgment call is aligning faucet spout reach with the drain. If the water stream strikes the flat basin floor instead of the slope near the waste hole, it causes constant splashing. When you must alter domestic water supply lines or relocate waste vents behind solid brick walls, hire a licensed plumbing contractor to prevent dangerous sewer gas leaks and code violations.
Key numbers and settings at a glance
Planning clearances prevents poor water flow and awkward daily use.
What separates good results from bad ones
Rough-in alignment and hardware prep
Planning begins inside the wall, not at the vanity surface. Modern wall-hung faucets and floating basins leave no room for plumbing errors. Install water supply outlets and the drain stub-out exactly on the sink’s vertical center line. A stub-out positioned just two inches off-center will force an angled P-trap, which ruins the clean aesthetic of an exposed chrome trap. Secure mounting brackets directly into solid timber blocking. Drywall anchors alone will tear out under daily downward hand pressure.
Faucet clearance and splash checks
Verify the faucet height relative to the sink wall before drilling holes. Tall vessel faucets paired with shallow rectangular sinks create splashback across the counter. The aerator should sit roughly 4 to 6 inches above the upper rim of the basin. Leave at least 2 inches between the faucet handle and the back splash so hands don’t hit the wall when turning the water on. Check the silicone seal partway through installation; wipe excess caulk immediately using a damp rag rather than letting it skin over on matte surfaces.
Common problems and quick fixes
Small errors during assembly cause leaks, slow drainage, or surface damage.
| What you notice | What it usually means | What to do first |
|---|---|---|
| Water pooling along basin rim | Countertop isn’t level | Loosen mounting clips and shim the base |
| Slow drain without clogs | Pop-up stopper gap is too narrow | Adjust the pivot rod link under the sink |
| Drips at the waste assembly | Gasket seated unevenly under drain | Re-seat the rubber washer with thread paste |
| Water splashing over edges | Water pressure too high for flat basin | Turn down local stop valves under the vanity |
Clearance limits and plumbing guidelines
Plumbing codes establish hard measurements for sink installations to ensure proper sanitation and safety. Clearances dictate that the center of the sink must sit at least 15 inches away from any side wall or shower partition, according to the International Code Council in the International Plumbing Code. For accessible spaces, the US Access Board ADA Standards require the top rim of a public lavatory to stand no higher than 34 inches above the finished floor, with a minimum clear knee space depth of 8 inches underneath.
If your installation requires cutting into load-bearing wall studs to route a new 1-1/2-inch vent line, you risk the structural stability of the room. Contact a licensed structural engineer or licensed plumber when framing alterations are needed.
Daily care and basin preservation
Modern finishes like matte black ceramic, concrete composites, and solid-surface resins require different care than traditional glossy porcelain. Clean the surface using a soft microfiber cloth and pH-neutral dish soap diluted in warm water. Avoid abrasive scouring pads, bleach, and cleaners containing citric or muriatic acids. These chemicals strip matte coatings and make cast resins porous.
Hard mineral crusts around the drain signal that cleaning is due. If your region has hard water, wipe the basin dry after each evening use to stop calcium rings from forming. Reseal concrete and natural stone sinks whenever water stops beading on the surface. Apply an appropriate impregnating stone sealer according to its container instructions, letting it dry completely before use.
When to use a different approach
This styling approach is the wrong choice for busy shared family bathrooms with small children. Above-counter vessel bowls and ultra-shallow trough sinks lack deep basin containment, so aggressive hand-washing splashes water onto surrounding walls and cabinetry. This design also fails in homes where users wash their hair over the sink.
Instead, choose a deep, drop-in vitreous china basin with a raised perimeter rim and an integrated overflow hole. Raised borders keep water inside the bowl, and thick, traditional glazed ceramic shrugs off heavy impacts from dropped items that would crack thin modern edges.
Frequently asked questions

Can a vessel sink have an overflow hole?
Yes, many contemporary vessel sinks include integrated overflow channels. However, thin-edge models frequently omit them. If your sink lacks an overflow hole, you must install an open, grid-style waste drain instead of a pop-up plug to prevent accidental room flooding.
Why does water splash out of my modern flat-bottom sink?
Water splashes because the basin lacks a contoured bowl to redirect the stream. When falling water strikes a flat floor, kinetic energy pushes droplets outward. You can fix this by installing a low-flow aerator to soften the flow.
How high should a floating bathroom sink be mounted?
Floating sinks should sit between 34 and 36 inches from the finished floor to the top of the rim for standard adults. This varies by model — check the label and adjust down to 32 inches if the household includes shorter users.
Is an undermount sink better than a vessel sink?
Yes, for cleaning speed and counter space, undermount sinks perform better. They allow you to sweep water and debris directly off the counter into the bowl. Vessel sinks create a tight, hard-to-clean seam where the basin bottom meets the vanity top.
What happens if you use regular bleach on a matte black sink?
The discoloration is permanent because the bleach breaks down the pigments in the resin or ceramic glaze. Wash matte surfaces only with mild soap and warm water.
Final Thoughts
The perfect basin shouldn’t just look good; it needs to fit your daily routine flawlessly. Before you commit to a specific shape, visit a showroom to test the depth and splash factor in person. You’ll find that seeing these pieces in real light makes choosing the right one much easier.
Related guides
- 5 Modern Vanity Styles That Fit Small Bathrooms: Chic Solutions
- Bathroom Light Fixtures Over Mirror: The Complete Guide
- All Bathroom Outlets Not Working: How to Reset Your GFCI






