
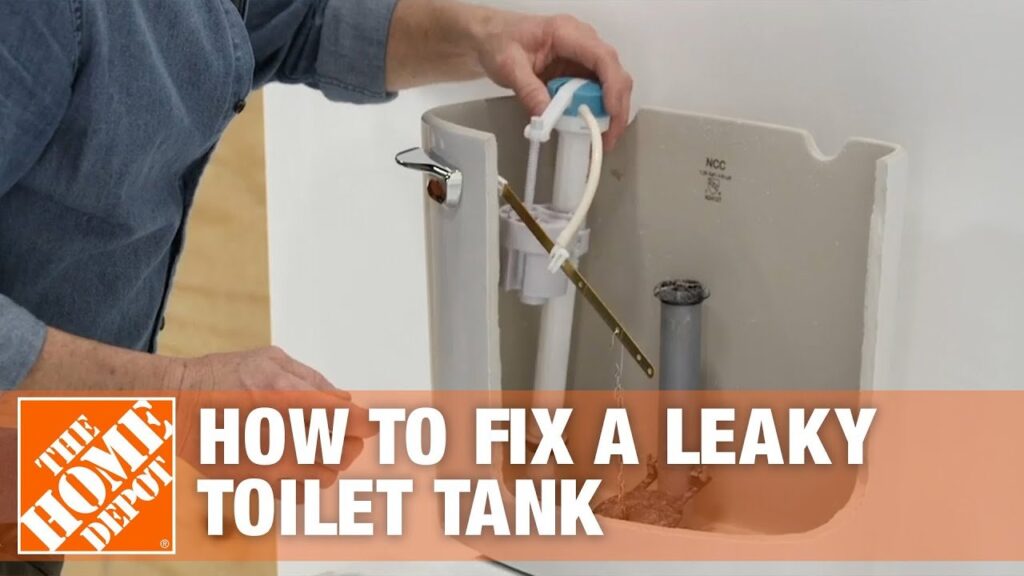
Replacing a toilet tank requires shutting off the water, unbolting the old reservoir, and setting a matching replacement over a fresh rubber gasket in about 45 to 60 minutes.
Table of Contents
What you’ll need

- A replacement tank that matches the bolt pattern and brand of your existing bowl (check the model stamp inside the old tank).
- A tank-to-bowl gasket sized to fit your flush valve opening (typically 2 inches or 3 inches).
- Two solid brass tank bolts with rubber washers and brass nuts (avoid steel bolts because they rust quickly).
- An adjustable wrench or a dedicated tank-bolt socket tool.
- A flathead screwdriver with a wide blade.
- A flexible braided water supply line measuring 12 inches to 16 inches.
- A small bucket and a large car-wash sponge.
Always use the specific rubber gasket designed for your tank and bowl; never use foam washers or silicone caulk, as these will cause leaks.
Step-by-step
- Turn the water supply valve behind the toilet fully clockwise until it stops turning.
- Flush the toilet, holding the handle down for 5 seconds to drain almost all the water out of the tank.
- Soak up the remaining 2 cups of standing water using your sponge, squeezing it out into your bucket until the porcelain bottom is completely dry.
- Unscrew the water supply line from the bottom of the fill valve using your adjustable wrench.
- Loosen the two tank mounting nuts from beneath the rear of the bowl, holding the bolt head steady from inside the tank with a flathead screwdriver. Careful: If the old nuts are rusted solid, cut them off with a mini hacksaw blade under the bowl rather than forcing them, which shatters the china.
- Lift the old tank straight up off the bowl and set it aside on an old towel.
- Press the new rubber gasket firmly over the flush valve nut on the bottom of the new tank, with the tapered side facing down toward the bowl.
- Drop the two new brass bolts—each fitted with its rubber washer—through the holes inside the tank, lower the tank onto the bowl, and alternate tightening each nut three turns at a time until the tank sits firmly against the bowl. Tip: If the tank rocks, tighten each side evenly; if it sits solid, stop turning immediately because extra torque will crack the porcelain base.
- Connect the supply line to the fill valve by hand, turn it an extra quarter-turn with a wrench, and open the shutoff valve.
Tank replacement across different setups
Bathroom plumbing conditions change the work needed to mount a tank securely.
| Bathroom Setup | Typical Time | Primary Difference | What to Monitor |
|---|---|---|---|
| Standard two-piece unit | 45 minutes | Direct drop-in match | Bolt alignment with bowl holes |
| Corroded steel hardware | 75 minutes | Bolts require cutting | Blade clearance near porcelain |
| Tight wall clearance (under 1 inch) | 60 minutes | Limited room for hands | Back wall scraping during lift |
| Different brand replacement | 90 minutes | Flush valve sizes differ | Gasket seating over bowl inlet |
It’s always safer to tighten mounting nuts in small half-turns and check for stability than to crank them tight immediately, which leaves no room to correct an uneven fit.
How to tell you did it right
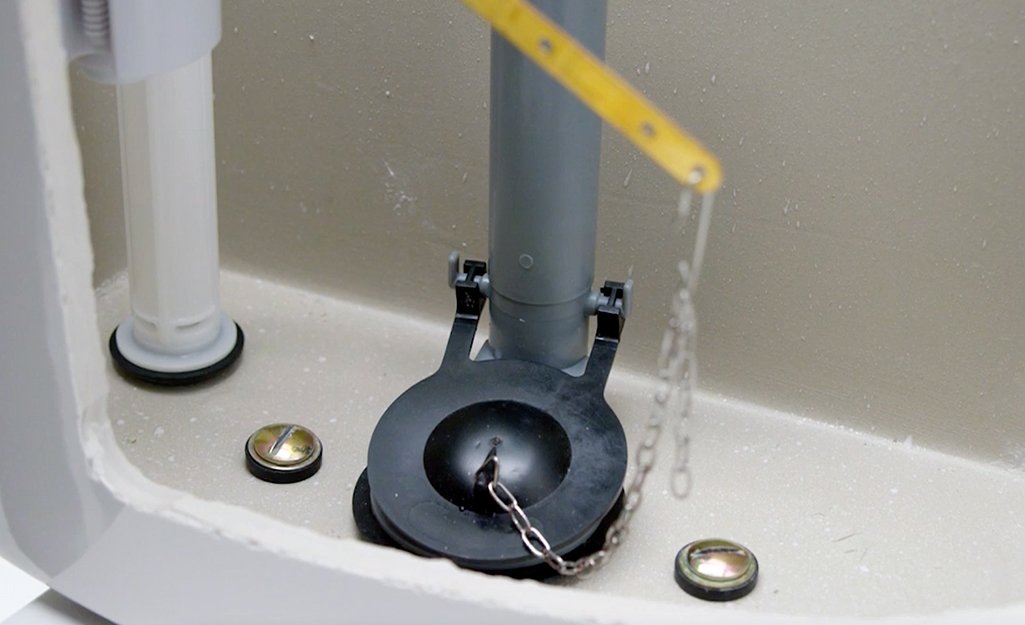
A correct installation shows the tank sitting level on the bowl without touching the drywall behind it. When you press gently on the front corners of the lid, the tank doesn’t wobble or tilt. A poor installation wobbles easily or drips water onto the floor right around the bolt heads.
Leaks usually happen because rubber washers slip out of alignment or pinch when someone tightens one bolt entirely before starting the second bolt. Alternating your turns keeps the rubber washer flat against the bottom porcelain hole. Wipe the floor dry with toilet paper under both bolts and check for moisture five minutes after filling.
Local plumbing codes and cleanup
Plumbing fixtures must meet efficiency laws; the EPA WaterSense program sets the maximum flush volume at 1.28 gallons per flush for certified models. Clear away your old rusted fasteners, throw away the hardened rubber gasket, and wipe down the bowl deck with disinfectant. Dry the floor completely so you notice fresh drips right away.
This repair isn’t for cracked toilet bowls; if your lower porcelain bowl shows hairline cracks, don’t mount a new tank to it—replace the entire unit.
Other ways to do it
Full toilet replacement
Replacing both the bowl and tank takes two hours and requires lifting 80 pounds of china. You trade the low cost of a tank swap for a completely fresh bowl, wax ring, and modern height, which avoids matching obsolete tank bolt patterns.
Rebuilding internal parts only
If the tank body is undamaged, you can install a new fill valve and flapper kit in 30 minutes for minimal expense. This solves constant running water or weak flushes without the risk of lifting heavy ceramic reservoirs or breaking mounting bolts.
Hiring a licensed plumber
Calling a professional tradesperson costs more in labor fees, but it removes personal liability for water damage. A plumber completes the replacement in under an hour and carries commercial tools to extract frozen bolts safely without chipping your fixtures.
Frequently asked questions
Can I put any tank on any toilet bowl?
No. Toilet tanks require matching bolt-hole spacing, flush valve diameters, and matching rear shelf shapes to create a watertight seal. A mismatched tank leaves gaps around the gasket, leaks instantly when flushed, or cracks under mounting pressure. Always match the original manufacturer and product line.
Why is my new tank leaking from the bolts?
Water leaks around the bolts when the rubber washers inside the tank are twisted, pinched, or not pressed flat against the porcelain. Shut off the supply, loosen the nuts slightly from below, center the rubber washer inside the tank, and tighten the hardware down evenly.
How tight should toilet tank bolts be?
Tighten the nuts until the tank rests firmly on the bowl’s raised porcelain nubs and doesn’t rock when pushed. You should compress the rubber gasket by about half its original thickness. Never use power tools or over-tighten, as excess pressure will snap the tank bottom.
Is it safe to leave the tank lid off during testing?
Yes. Operating the toilet without the lid lets you inspect the fill valve shutoff height, watch the flapper seal, and verify the overflow tube functions properly. Set the heavy porcelain lid flat on a carpeted floor during your test so it doesn’t slip and crack.
What happens if the supply valve won’t shut off completely?
A leaking supply valve allows water to fill your bucket continuously while you work. If the local shutoff valve drips or fails to stop the water flow entirely, you must turn off the main water shutoff valve for your entire house before disconnecting any toilet lines.
Final Thoughts
Once everything is secure, turn the water valve back on slowly to check for leaks around the base. If the floor stays dry, you’ve done a great job. Keep a close eye on it for the next hour, and don’t be afraid to tighten the bolts just a little more if needed.
Related guides






