
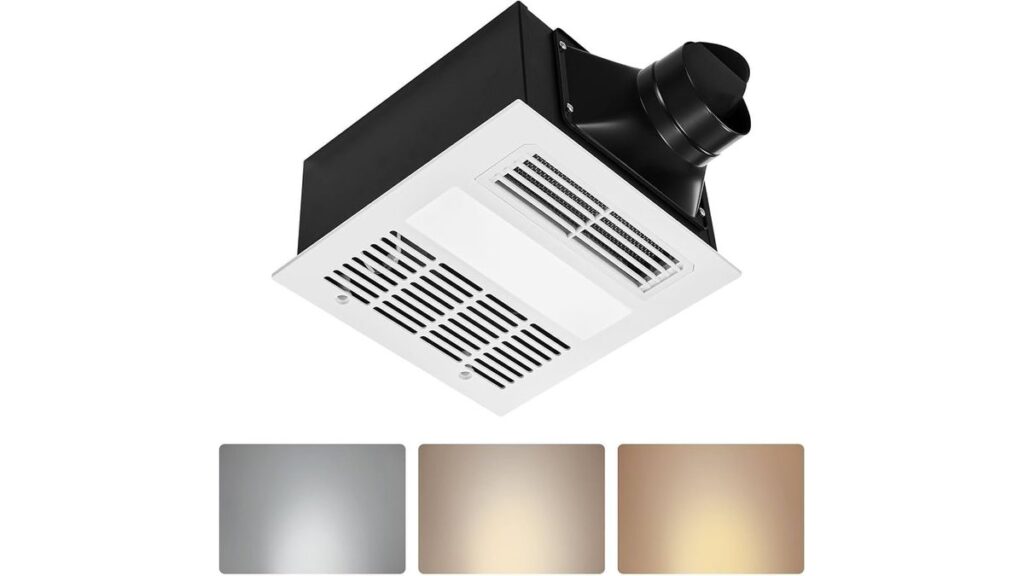
Choosing premium bathroom exhaust fans with light and heater requires matching air movement to your square footage, usually 50 CFM minimum for bathrooms up to 50 square feet, or 1 CFM per square foot for larger bathrooms., while pulling between 1,300 and 1,500 watts of heating power. You’ll need a dedicated 20-amp circuit to run these combination units safely. This guide covers sizing rules, electrical demands, ducting physics, and setup methods that simple product boxes leave out.
Table of Contents
How premium bathroom exhaust fans function
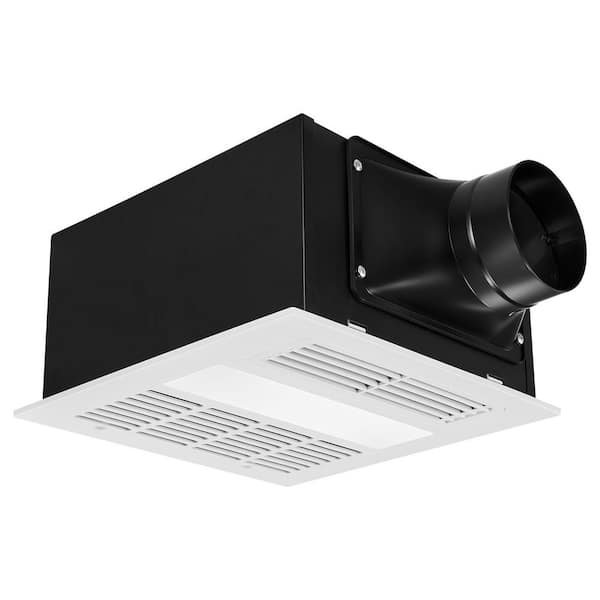
A three-in-one bathroom unit combines a moisture ventilation fan, an overhead light fixture, and an electric resistance heater into a single ceiling-mounted housing. It clears steam after showers, lights the room, and provides fast supplemental warmth directly below the vent. People use them to keep mirrors clear and stop chilly drafts without raising the central thermostat for the whole house.
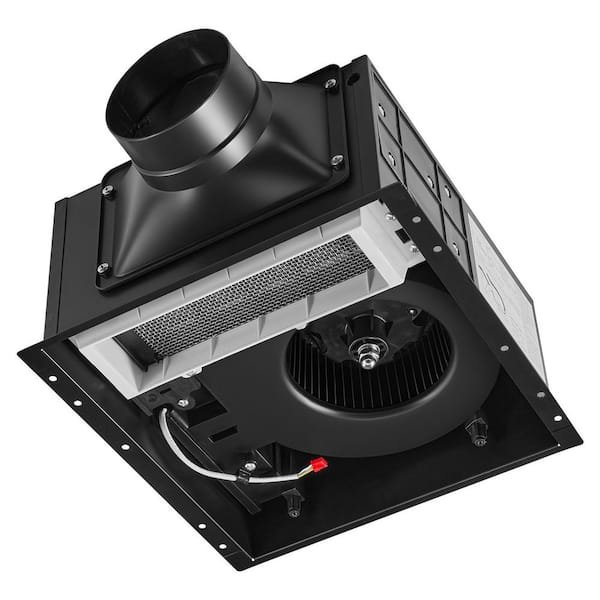
A common misconception is that the built-in heater will warm the entire house or replace your primary heating system. It won’t. The heating element uses a blower wheel to blow warm air over a small area while you dry off. The trade-off is clear: you get three fixtures in one ceiling cutout, but you must run heavier electrical wiring through your walls to support the total wattage. This varies by model — check the label for exact electrical and duct requirements before buying any parts.
The basic method
Installing one of these units requires strict steps to ensure the fan vents properly and the heater operates safely.
- Turn off the master power switch at your main service panel and verify the circuit is dead using a non-contact voltage tester.
- Measure your room dimensions in feet (length times width) to find your square footage; plan for at least 1 CFM per square foot.
- Cut a ceiling opening between two joists, matching the housing template provided by the manufacturer, typically around 11 by 11 inches or larger.
- Run a dedicated 120-volt, 20-amp electrical cable (12-gauge wire with ground) from the panel directly to the wall switch box. If local laws require licensed work for running new circuits from the panel, hire a licensed electrician to handle the main panel connection.
- Fasten the metal housing directly to the ceiling joists using 1-1/2-inch wood screws through the adjustable suspension brackets.
- Connect the 4-inch or 6-inch rigid metal ducting to the unit’s outlet collar, then seal the seam with foil-backed HVAC tape.
- Terminate the duct through the roof or exterior side wall using a backdraft damper cap; never leave it venting into an attic space.
- Wire the fan, light, and heater to their matching switch controls according to the wire color codes, then push the grille springs into place.
The single judgement call that separates a good result from a bad one is choosing duct material. Rigid metal pipe lets air flow freely, but cheap ribbed vinyl foil bends easily and traps moist lint, choking air movement.
Key numbers and settings at a glance
Use these baseline numbers to plan your installation based on the size and layout of your space.
| Situation | What to use | How long | What to watch for |
|---|---|---|---|
| Half-bath up to 50 sq ft | 50 CFM fan, 1,000W heater | Run fan 20 mins post-shower | Condensation on cold glass |
| Full bath, 50–75 sq ft | 80 CFM fan, 1,300W heater | Run fan 20 mins post-shower | Proper duct width (4-inch min) |
| Master bath, 75–100 sq ft | 110 CFM fan, 1,500W heater | Run fan 20 mins post-shower | 20-amp dedicated circuit load |
| Master suite over 100 sq ft | 150 CFM fan, 1,500W heater | Run fan 20–30 mins post-shower | Static pressure in long ducts |
| Ducts running over 25 feet | Move up from 4-inch to 6-inch pipe | Run fan 20 mins post-shower | Condensation pooling in dips |
What separates good results from bad ones
Preparation and mechanical alignment
Experienced installers check what is above the ceiling before making a single cut. If attic access is clear, they work from above; if the ceiling is sealed, they cut drywall precisely between the joists to avoid costly patching. They install the outer wall or roof cap first so they can run ducting in a straight, downhill path toward the exit. Sloping the duct slightly downward toward the outdoors stops condensed water from running backward into the electrical motor.
Electrical isolation and airflow checks
Wiring these combination appliances requires careful load planning. Trying to run a 1,500-watt heating coil on an existing shared 15-amp lighting circuit is a classic mistake people make. It trips the circuit breaker the second someone turns on a hair dryer, leaving you in the dark and forcing you to run new wire through finished walls later. Keep the heating element, blower, and light on their own dedicated switches. Make sure the backdraft damper flapper inside the housing swings freely before securing the outer grille.
Common problems and quick fixes

When something goes wrong with an exhaust unit, check these physical parts first.
| What you notice | What it usually means | What to do first |
|---|---|---|
| Breaker trips immediately on start | Circuit overloaded or shorted | Check that the wire gauge is 12 AWG on a 20A breaker |
| Fan runs but mirror stays fogged | Blocked duct or weak CFM | Inspect exterior flapper vent for stuck louvers |
| Air blows cold from the heater | Thermal cutoff switch opened | Clear built-up dust from the heating coil grill |
| Rattle or humming sound | Loose housing bracket | Tighten bracket mounting screws into the joist |
| Dripping water from the grille | Air cooling inside uninsulated duct | Wrap attic ducting with R-6 insulation sleeve |
Safe operation limits and wiring rules
Heating elements draw heavy current, making building codes very strict. The National Electrical Code (NEC) dictates that continuous loads must not exceed 80 percent of the circuit breaker’s rating. That means a 1,500-watt heater plus a motor and lamp requires a dedicated branch circuit that should only be tested by a qualified technician.
For moisture removal efficiency, the Home Ventilating Institute recommends sizing ventilation at a minimum of 1 CFM per square foot of room area for bathrooms up to 100 square feet. If you must route brand-new wires through walls or tie into the main breaker panel, that step needs a licensed electrical contractor to meet building codes safely. Never open the internal heater enclosure or touch inner electrical capacitors yourself; an unplugged capacitor can still hold a severe charge.
Caring for your ceiling fixture
Dust and moisture create a thick paste that clogs heater elements and slows down fan blades. Clean the ceiling grille whenever you see lint building along the slots, or as part of your usual clean.
To clean it, pull down the plastic faceplate, squeeze the wire mounting springs, and take the cover off. Vacuum the surface of the blower wheel and wipe the grille with warm water and mild dish soap. Don’t spray water or chemical cleaners directly into the metal housing where the motor and heating coils sit. Let the plastic dry completely before snapping it back into place. Keeping these passages clean stops the heater’s automatic thermal safety switch from shutting the system down due to poor airflow.
When to use a different approach
This all-in-one setup isn’t the right choice for every home. In that case, choose a separate wall-mounted heater instead.
If your home lacks attic space and only has a tiny 3-inch duct opening through an exterior brick wall, this style isn’t for you. Three-in-one units need at least 4-inch, and often 6-inch, ducting to move steam without overheating the motor. For tiny powder rooms without a shower, a standard lighted fan without a heater saves power and space.
Frequently asked questions
Can I wire the heater and fan to one single switch?
No, you should never wire them together. Wiring them to separate wall switches lets you vent moisture during summer months without blowing unwanted hot air into the bathroom, saving energy and keeping the room comfortable.
Why does my combination fan sound so loud?
High noise levels usually come from undersized or pinched ductwork. If an 80 CFM fan is forced to blow air through a bent 4-inch foil duct, static air pressure builds up, causing the motor and air wheel to vibrate noisily.
How long can I leave the ceiling heater running?
Twenty minutes is the standard limit for warming a bathroom during a shower. These heaters provide fast supplemental heat while you bathe; leaving them on for hours wastes electricity and can trigger the internal thermal cutoff.
Is it safe to install this unit right over a shower stall?
Yes, but only if the manufacturer rates the unit for wet locations and you wire it through a GFCI-protected circuit.
What happens if I vent the fan into my attic?
Dumping humid air into an unconditioned attic causes mold growth on rafters, rots plywood roof decking, and ruins insulation. Building codes require venting all moist bathroom air directly to the outside through a dedicated exterior cap.
Final Thoughts
Installing these units creates a cozy, moisture-free sanctuary that feels like a private spa. Once you’ve verified your wiring, you’ll be ready to enjoy the warmth during those chilly mornings. Don’t hesitate to consult a local electrician if you’re unsure about your home’s current setup; it’s better to be safe than sorry.
Related guides
- How to Soundproof a Bathroom Exhaust Fan: 3 Effective Fixes
- How to Pick a Quiet Bathroom Exhaust Fan: Sone and CFM Guide






