
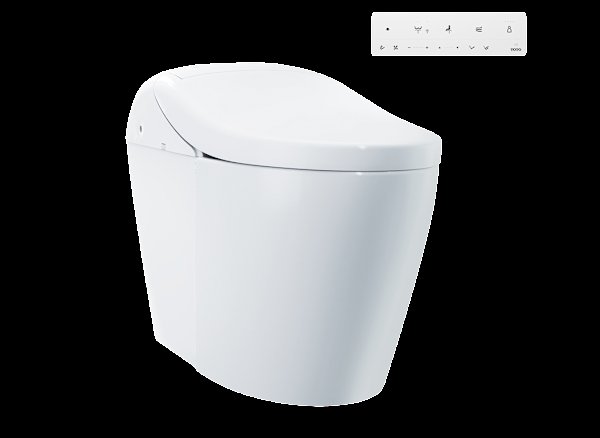
A comprehensive review toto washlet integrated toilet units earn shows they deliver exceptional hygiene through heated seats, dual-nozzle warm water sprays, and automated flushing, but they demand a dedicated electrical outlet and strong water pressure to function correctly. These smart fixtures combine a ceramic bowl and an electronic bidet into one seamless appliance. This guide examines real operating thresholds, water volume demands, physical site requirements, and common installation pitfalls you must plan for before buying.
Table of Contents
Reviewing the integrated Toto Washlet experience

An integrated smart toilet combines a vitreous china bowl with a built-in motorized bidet system in a single chassis. It’s designed for homeowners who want hands-free personal hygiene, warm air drying, and automatic bowl misting without mounting an awkward plastic seat attachment onto an old fixture. A common misconception is that these units work like standard plumbing fixtures that run during power outages. They don’t. The internal pumps, seat heaters, deodorizers, and solenoid flush valves require continuous electrical power.
The core cleaning mechanism relies on an electrically powered wand that extends at a set angle, mixes air with heated water, and sprays the user before retracting behind a protective shutter. The system sprays the bowl with electrolyzed water—known as EWATER+—before and after use. This process curbs waste adhesion by wetting the ceramic glaze. You can learn about high-efficiency flush standards directly from the EPA WaterSense program specification, which qualifies toilets using 1.28 gallons per flush or less.
The basic method
Installing and commissioning an integrated unit requires careful sequencing across plumbing and electrical connections:
- Turn off your main shutoff valve and drain the existing toilet completely using a sponge until zero water remains in the trap.
- Remove the old closet bolts and scrape the closet flange clean of all old wax residue using a putty knife.
- Check the rough-in distance from the finished drywall to the center of the floor drain bolts; verify it measures exactly 12 inches.
- Set the new mounting plate and ceramic base over a new wax or foam ring, then tighten the floor nuts to 3 to 4 foot-pounds without cracking the porcelain.
- Thread the braided 1/2-inch water supply line to the dedicated brass junction valve, tightening half a turn past hand-tight.
- Plug the grounded three-prong plug into a 120-volt, 15-amp GFCI-protected outlet located within 3 feet of the bowl.
- Open the shutoff valve fully, wait 2 minutes for the internal tank to prime, and press the power toggle on the master switch panel.
- Run a remote-control test by resting your hand on the seat sensor while holding a paper cup over the wand nozzle to catch the initial 15-second test spray.
Test your home’s static water pressure before mounting the chassis. If your supply runs below 30 PSI, the tankless flush valves may not clear waste properly; if your water pressure reads above 30 PSI, the system generally clears the bowl smoothly.
Key numbers and settings at a glance
Every bathroom presents unique conditions that determine your unit’s performance:
| Situation | What to use | How long | What to watch for |
|---|---|---|---|
| Standard rear wash | Medium pressure, 98°F to 104°F spray setting | 45 to 60 seconds per use | Wand self-clean cycle before extension |
| Soft rear wash | Lower pressure, wide-angle spray setting | 60 seconds per use | Proper wand alignment on the target area |
| Front feminine wash | Lower pressure, forward position preset | 30 to 45 seconds per use | Nozzle overshoot past the user |
| Warm air drying | High fan speed, warm heat setting | 2 to 3 minutes | Residual moisture requiring a light dab of paper |
| Deep deodorizing | Automatic carbon filter exhaust | 60 seconds after standing | Blocked intake vents behind the seat base |
What separates good results from bad ones
Site preparation and electrical rough-in
Successful installations depend on planning the power and water rough-ins before the ceramic ever leaves the box. Avoid placing the electrical outlet directly behind the ceramic skirt, which prevents the base from sitting flush. Set the GFCI box 6 to 8 inches above the floor and 12 inches left of the centerline. This ensures clearance for the power cord.
Waterline sizing and handling
The plumbing connection demands strict discipline. The integrated flush engine uses an internal high-flow valve rather than a gravity tank. Connecting to an old 3/8-inch stop valve restricts volume, causing weak flushes. Supply a 1/2-inch pipe or copper line to the shutoff stop. Don’t touch the infrared sensor window, as smudging it drops the wireless signal range.
Common problems and quick fixes

When your smart toilet behaves unusually, check these verified solutions:
| What you notice | What it usually means | What to do first |
|---|---|---|
| Weak water spray from the wand | Inlet water filter screen is clogged with sediment | Turn off the stop valve, remove the filter cap, and rinse the mesh screen |
| Seat doesn’t heat up | Energy-saver mode is active or seat sensor is dirty | Turn off the timer mode on the remote and wipe the seat contact pad |
| Auto flush doesn’t trigger | Infrared proximity sensor window is smudged or blocked | Clean the dark glass sensor window using a damp microfiber towel |
| Wand fails to extend | Remote batteries are dead or the nozzle track has mineral scale | Replace the AA batteries or pull the nozzle out gently by hand to descale |
| Water keeps trickling into the bowl | Flush valve seal has caught mineral grit | Cycle the manual flush button twice to clear debris off the rubber gasket |
The rules that apply
Plumbing and electrical codes strictly regulate integrated bidet toilets to protect your home’s potable water supply and prevent fire risks. Under the Uniform Plumbing Code (UPC) and the International Plumbing Code (IPC), every bidet seat or integrated fixture must incorporate an internal backflow preventer. This assembly must meet ASME A112.4.2 / CSA B45.16 standards to prevent waste water from siphoning back into your drinking water lines.
The National Fire Protection Association, through NFPA 70 (the National Electrical Code), requires the electrical receptacle serving this fixture to be a dedicated, GFCI-protected branch circuit. The outlet must be installed outside of wet tub-and-shower zones.
Maintaining the appliance components
Protect internal pumps and external glazes from abrasive wear.
Regularly inspect the braided supply hose for cracks. Never use chlorine tablets; they destroy internal seals and cause leaks. Hard water will eventually narrow the spray pattern. Extend the wand manually and wipe the nozzle with vinegar.
When to use a different approach
This integrated system isn’t the right choice for homes with gravity-fed plumbing running below 20 PSI, because the tankless flush engine will fail to evacuate solids cleanly. In that situation, install a traditional gravity-fed toilet paired with a separate bidet seat instead.
This unit is also not for rental apartments or older homes where running an electrical outlet near the toilet isn’t allowed by the landlord or building layout. In those spaces, choosing a non-electric bidet attachment that runs solely on mechanical water pressure avoids electrical work and preserves your security deposit. The trade-off is clear: you give up the heated seat, dryer, and automatic flushing to save substantial installation costs.
Frequently asked questions

Can you use a smart toilet during a power outage?
Yes, you can flush the unit manually during a blackout using an emergency mechanical lever or battery-backup pull cord concealed under the side cover. However, the seat heater, warm spray, and drying fans won’t work until power returns.
Why does the wand water spray take a few seconds to start?
The appliance purges cool standing water out of the internal lines and pre-heats fresh supply water before extending the nozzle. This brief pause prevents an uncomfortable cold burst from hitting your skin.
How long does the deodorizer filter last?
The catalytic carbon deodorizer filter should be replaced periodically according to the manufacturer’s manual as its absorption capacity diminishes over time. You only need to slide the filter screen out and vacuum away dust as part of your usual clean.
Is it safe to clean the toilet with standard bowl cleaners?
No, acidic or abrasive cleaners strip the proprietary anti-adhesion glaze and degrade the wand’s plastic housing. Clean the ceramic bowl using a neutral dish soap or a mild, non-abrasive liquid bathroom cleaner on a soft sponge.
What happens if the remote control batteries run out?
The basic operational controls remain accessible through backup buttons located directly on the toilet’s side housing. You can trigger a full flush or start a basic rear wash without using the wireless remote.
How much water does an integrated dual-flush system use?
A full flush uses 1.0 to 1.28 gallons of water, while a light flush for liquids uses only 0.8 to 0.9 gallons. These figures depend on whether you select the full or light cycle on the remote control.
Final Thoughts
Investing in this technology truly elevates your daily comfort, but don’t rush the purchase. You’ll want to consult with a licensed plumber to verify your bathroom’s specific layout and power access first. Once you’ve confirmed your space is ready, you’re going to love the upgrade to your home’s most essential room.






