
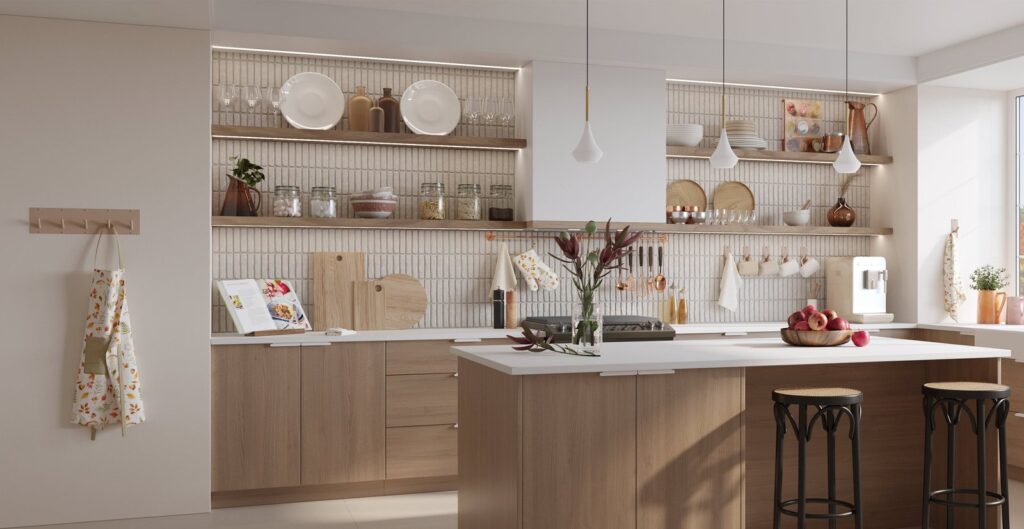
Choosing the right space saving wall shelves that add style and storage your ultimate guide requires matching your wall build to shelf depth, holding between 10 and 50 pounds per stud connection. For tight rooms, pick depths between 6 and 10 inches so pathways stay clear. Beyond basic dimensions, this guide details correct fastener selections, wall anchoring mechanics, and safety tolerances that simple two-line buying tips leave out.
Table of Contents
How space saving wall shelves add storage

Wall-mounted shelving turns unused vertical room into usable storage without stealing floor area. These units hold books, kitchen supplies, or display items on brackets, hidden rods, or track rails secured to wall framing.
Homeowners and apartment tenants use them to open up crowded rooms. The biggest misconception is that drywall anchors hold heavy decorative loads safely over time. Drywall crumbles under pulling forces because hollow gypsum lacks structural strength. True weight capacity comes from the wooden studs hidden behind the wall board, where wood screws grab solid lumber.
The trade-off with slim shelves involves functional volume: a shallow 6-inch shelf looks light and keeps small hallways open, but it won’t hold full-sized dinner plates or large textbooks.
The basic method
Installing shelving securely requires steady alignment and solid contact with wall framing. Gather a stud finder, a 24-inch bubble level, a power drill, and 2.5-inch wood screws.
- Scan the wall horizontally using an electronic stud finder to locate the edges of two vertical studs, marking their exact centers with a pencil.
- Hold your mounting bracket against the wall at your chosen height, usually between 48 and 60 inches from the finished floor.
- Place a bubble level across the top of the bracket to verify it sits level, then pencil through the mounting holes directly over the stud marks.
- Drill 1/8-inch pilot holes roughly 2 inches deep into the wall framing to prevent the wooden studs from splitting when screws enter.
- Place the bracket over the pilot holes and drive 2.5-inch steel wood screws through the bracket into the studs using a drill driver.
- Slide the shelf board onto the secured brackets, then fasten the underside with the small 1/2-inch locking screws included with your hardware kit.
The single judgment call that decides your success is confirming solid wood contact. If the drill bit enters freely without resistance after piercing the drywall, you missed the stud; stop immediately, fill the hole, and locate the wood before mounting any load. If your home has electrical conduit running along brick walls, hire a licensed electrician to verify cable paths before drilling.
Key numbers and settings at a glance
Select your hardware based on what the wall is made of and what you plan to store.
| Situation | What to use | How long | What to watch for |
|---|---|---|---|
| Wood studs behind drywall | #10 size, 2.5-inch wood screws | 15 minutes per bracket | Centering the screw directly in the stud |
| Hollow drywall between studs | 3/16-inch steel toggle bolts | 20 minutes per anchor | Drill hole diameter matches the folded toggle width |
| Solid red brick or mortar | 1/4-inch concrete sleeve anchors | 25 minutes per bracket | Drilling straight into brick rather than soft mortar joints |
| Poured solid concrete | Masonry screws with pilot holes | 20 minutes per bracket | Dust clearing from the hole before driving fasteners |
What separates good results from bad ones
Preparation and hardware selection
A common mistake is using plastic plug anchors supplied in retail boxes for heavy loads, which pulls out of drywall and destroys wall surfaces. If your shelf holds heavy ceramic dishes, secure it to wall studs; if you only display light framed photos under five pounds, hollow-wall anchors work safely. Experienced installers map the room layout first. They test shelf heights with blue painter’s tape before drilling single holes.
Assembly sequence and level checks
Always mount the first bracket, tighten it halfway, and place the shelf across to verify levelness with the second bracket before making the second set of pilot holes. Never trust floor lines or ceilings for alignment because houses settle unevenly over time.
Common problems and quick fixes

When shelves lean or loosen, simple hardware adjustments solve the mechanical fault.
| What you notice | What it usually means | What to do first |
|---|---|---|
| Shelf slopes downward at the front edge | Bracket arm bent or screws pulled loose from drywall | Shift fasteners into solid wood framing |
| Board wobbles when touched | Underside set screws are missing or loose | Tighten the short retention screws beneath the shelf |
| White powder gathers beneath the mount | The drywall anchor hole has stripped out | Remove the plug and replace it with a wider steel toggle |
| Bracket pulls away at top screw | Fastener lacks adequate grip depth inside the wall | Replace short screws with 2.5-inch wood fasteners |
Safe load limits and building standards
Shelf safety depends on staying within structural boundaries. The International Residential Code establishes structural performance baselines for interior partitions, which standard builders use to space wall framing 16 inches apart on center.
When mounting heavy shelving units that children might reach for, install anti-tip hardware tested against safety specifications. The CPSC safely home guidance outlines anchoring techniques to prevent furniture and storage pieces from pulling free and causing crush injuries.
If your wall construction consists of hollow clay tile or historic lath and plaster, ordinary toggle bolts can crack internal surfaces; hire a bonded contractor who has specialized masonry fastening tools.
Keeping your installation secure
Once mounted, wipe wood and metal shelves using a dry microfiber cloth to prevent moisture damage. Avoid spraying liquid furniture polish directly near bracket joints where moisture can seep behind the wall plate.
Inspect your installation whenever you notice a slight tilt, or check screw tightness regularly by giving each shelf a light upward lift. If a bracket moves even slightly, unload the items and retighten the wall screws immediately. Never load shelves beyond the combined rating printed on the manufacturer’s bracket box.
When to use a different approach
This wall-mounted approach isn’t for renters whose leases forbid drilling into plaster, or for rooms with crumbly, degraded plaster walls.
For renters, use freestanding ladder bookcases that lean against walls with minimal anchoring requirements. For heavy tool storage or loads exceeding 100 pounds per section, purchase freestanding industrial steel shelving units that rest directly on the floor. Trying to float high-weight utility storage on standard decorative wall brackets will eventually tear away the gypsum surface.
Frequently asked questions

Can floating shelves hold heavy books?
Yes, but only when brackets screw straight into wood wall studs. A standard hollow-wall anchor pulls out under that load, while two solid wood screws handle the weight without bending.
How much weight can drywall hold without studs?
About 10 to 25 pounds when using proper steel toggle bolts. Plastic ribbed expansion anchors often fail at lower weights under forward-pulling loads. For long shelves holding everyday objects, never rely on drywall alone without stud support.
Is it safe to hang shelves with adhesive strips?
No, adhesive strips can’t manage the forward leverage that loaded shelves create. They might hold lightweight picture ledges temporarily, but temperature changes cause the adhesive to release suddenly, dropping your items and peeling away your paint.
Why does my floating shelf sag forward?
Your bracket hardware has bent, or the top mounting screw has pulled slightly out of the wall. Shelves act as levers that pull outward on upper screws. Replace short screws with 2.5-inch fasteners driven directly into the center of a stud.
How far apart should shelf brackets be placed?
Brackets should sit 16 or 32 inches apart to align with standard residential wall stud spacing. Spacing brackets wider than 32 inches apart causes wood boards to bow in the middle when loaded with ordinary decorative items.
Final Thoughts
Once you’ve cleared your floor space, take a moment to style your new display with a few favorite books or small plants. Don’t be afraid to experiment with different arrangements until the look feels just right. You’ll love how much bigger your room feels once everything is neatly tucked away.
Related guides
- Installing Floating Shelves for Bathroom Storage Step by Step
- 3 Hole Kitchen Faucets: How to Choose the Best Style for You
- Minimalist Bathroom Storage Ideas That Actually Work Elevate Your Space






