Caring for a loved one with mobility challenges can be both rewarding and demanding. One seemingly small task, like using the bathroom, can become a significant hurdle.
That’s where a toilet seat riser with handles comes in handy. It’s an essential tool that can make life easier and safer for both you and the person you’re caring for. But how do you go about installing one? Imagine the peace of mind you’ll feel knowing that a simple modification can drastically improve comfort and safety.
In this guide, we’ll walk you through each step of the installation process, ensuring you have all the information you need to get it right the first time. With easy-to-follow instructions and practical tips, you’ll soon transform the bathroom into a safer environment. Ready to make a difference? Let’s dive in!
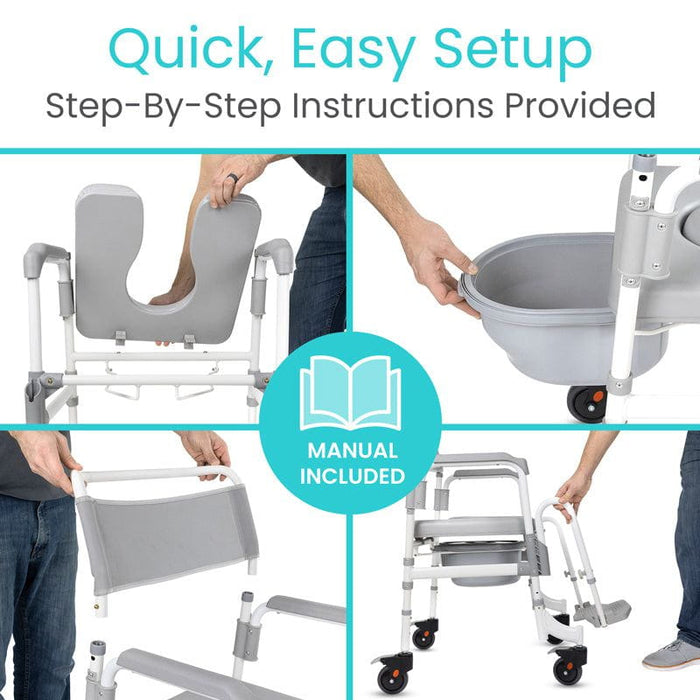
Credit: www.vivehealth.com
Table of Contents
Tools And Materials Needed
Gather all the necessary tools and materials. You will need a screwdriver, wrench, and a tape measure. A new toilet seat riser with handles is essential. Make sure it fits your toilet.
Check if you need extra screws or bolts. Sometimes, the kit includes them. Always have a clean cloth to wipe the area. A pair of gloves can protect your hands during the installation. Keep all items within reach.
Having a step stool might help if you need extra height. Ensure you have enough light in the room. This helps you see the parts clearly. You are now ready to start the installation process.
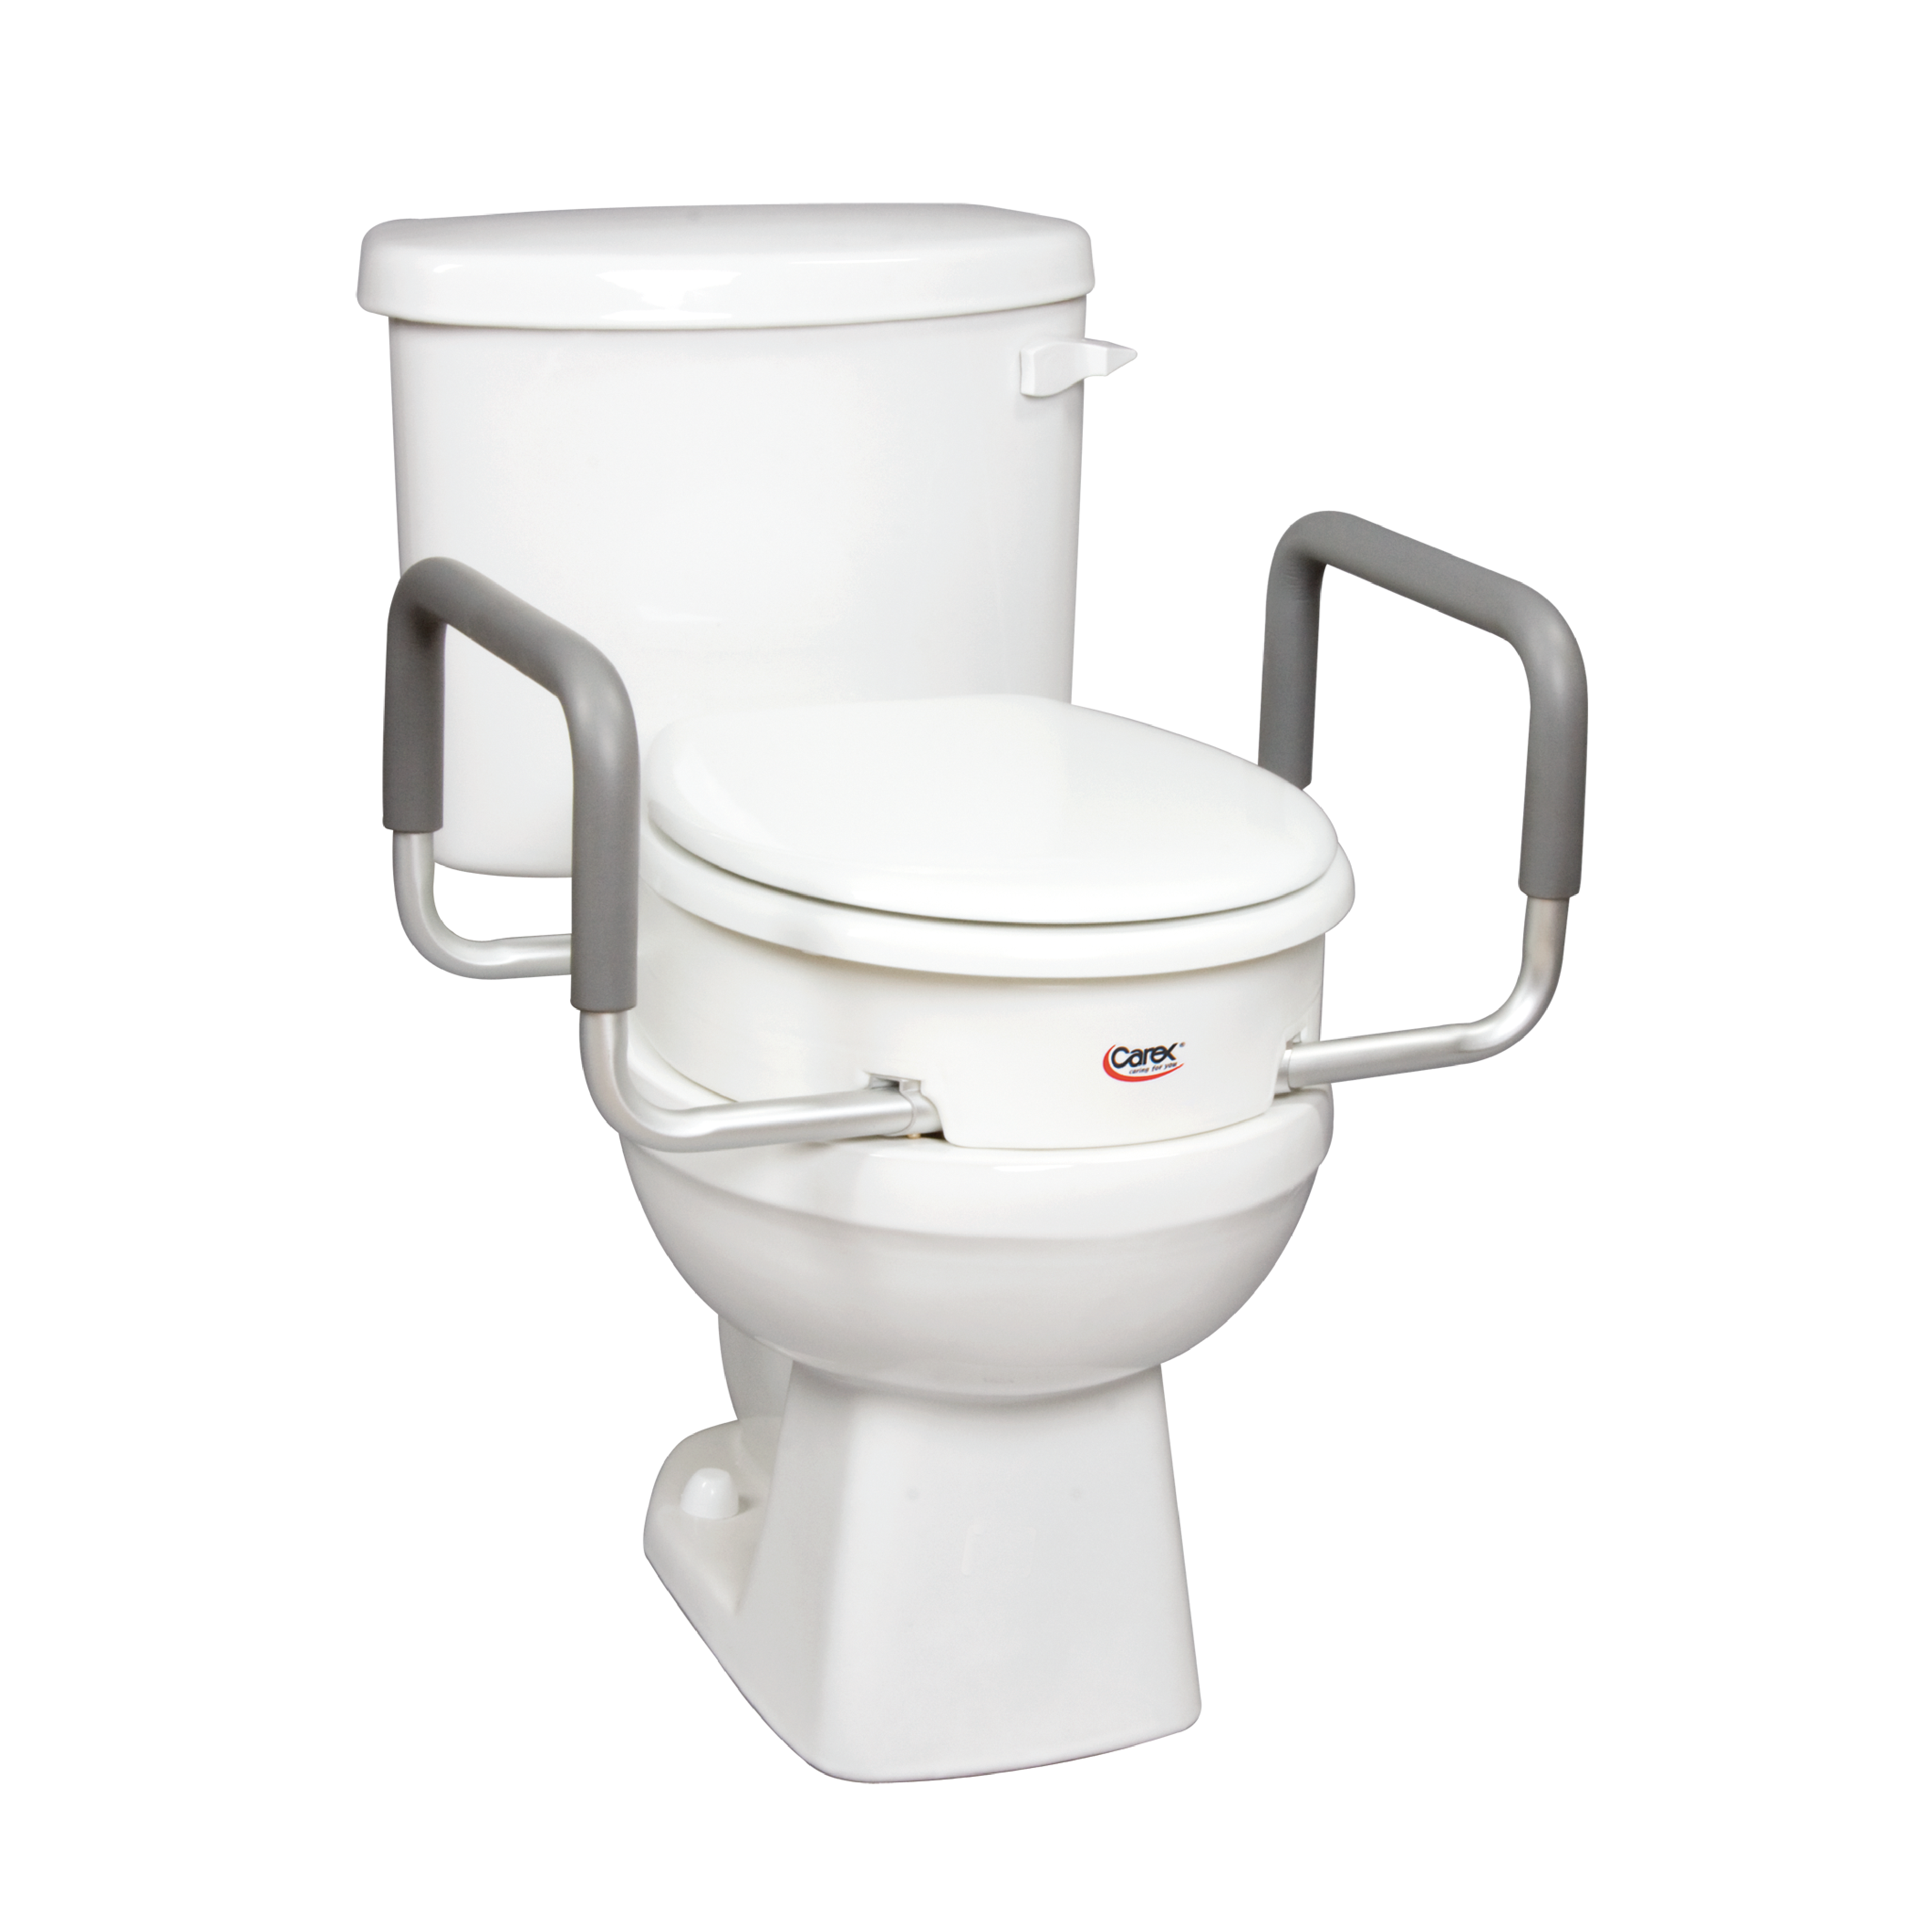
Credit: carex.com
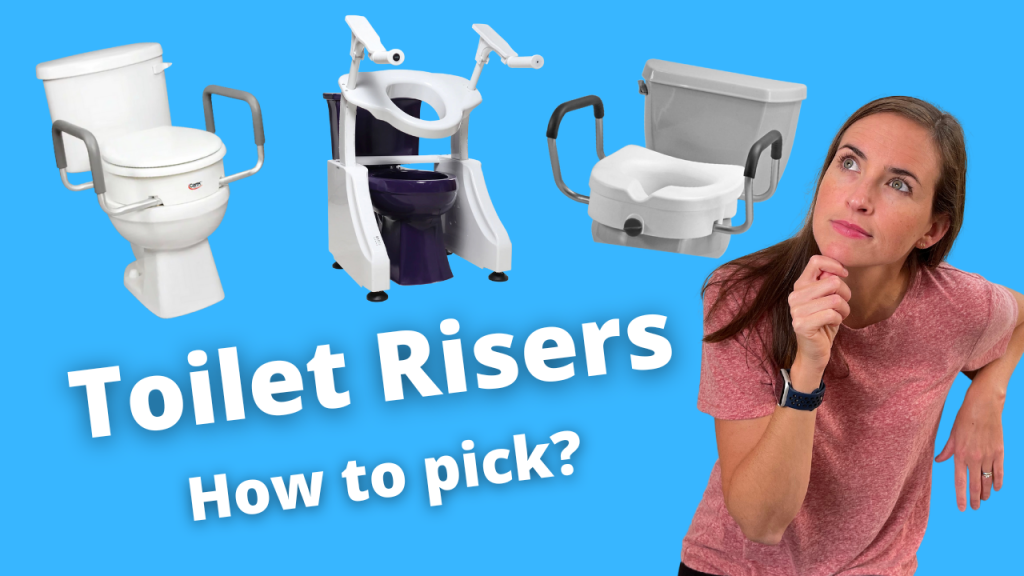
Selecting The Right Toilet Seat Riser
Understanding user needs helps in making the right choice. Some users need more height, while others need more stability. Consider if the user needs handles for extra support.
Bathroom space matters too. Measure the area around the toilet. Make sure there’s enough room for a riser with handles. Some bathrooms are small. Others have more space. Choose a riser that fits well.
Checking compatibility is crucial. Not all risers fit all toilets. Look at the toilet’s shape and size. Compare it with the riser. Ensure they match perfectly. A good fit means better safety.
Preparation Steps
Start by gathering tools like a wrench and screwdriver. Ensure the toilet area is clean and dry. Organize all parts, checking for missing pieces before installation.
Cleaning The Toilet Area
Start by putting on gloves. Gather your cleaning supplies. Use a good cleaner and a cloth. Wipe the toilet seat and the rim. Scrub away any dirt. Pay special attention to corners. Make sure the area is completely clean. Rinse it with water. Dry the toilet with a towel. This ensures a hygienic surface.
Removing The Existing Toilet Seat
Find the bolts at the back of the seat. Use a screwdriver to loosen them. Hold the seat steady with your other hand. Carefully lift the seat off the toilet. Check for any remaining parts. Remove any washers or nuts. Keep these parts in a safe place. You may need them again. Ensure the toilet is ready for the new riser.
Credit: www.equipmeot.com
Installing The Riser
Align the riser with the toilet bowl. Ensure the holes match. Handles should face outward. Check the riser is level. Adjust if needed. Proper alignment is key for safety.
Secure the riser using included bolts. Tighten each bolt evenly. Avoid over-tightening. This may crack the riser. Double-check each bolt. Ensure they are snug. Handles must be steady. Test by gently shaking them. If loose, tighten more.
Attaching The Handles
Place the handles beside the seat. Make sure each handle aligns with the seat holes. The handles should face outward. Check for a snug fit.
Insert screws into the seat holes. Use a screwdriver to turn screws. Turn until the handles are tight. Ensure screws are not loose. Check handle stability. Handles should not wobble. Tighten more if needed.
Final Adjustments
Ensuring Stability is crucial for safety. First, check the tightness of the bolts. They should be snug but not overly tight. Feel the riser and handles; they should not wobble. If any parts feel loose, adjust them. Use a wrench if needed. Double-check each handle. Both should be firmly attached.
Confirm the riser is level. Uneven surfaces can cause problems. Ensure all parts are aligned. This prevents tipping and sliding. A stable riser gives confidence to the user. Now, move on to the next step.
Testing the Setup is a vital task. Ask someone to sit on the riser. The person should feel secure. Notice any movement or sway. If the riser shifts, further adjustments are needed. Observe the handles. They should support weight without bending. Check each component one last time. A final test ensures everything works well.
Safety Tips For Use
Ensure stability by firmly securing the toilet seat riser with handles. Double-check all bolts for tightness. Always test the handles for sturdiness before use to prevent accidents.
Regular Maintenance Checks
Check the toilet seat riser often. Look for any loose screws or wobbly handles. Tighten them to keep the seat safe. Make sure the riser is clean. Dirt can make it slippery. This can cause accidents. Use a mild cleaner. Wipe it dry with a soft cloth.
User Safety Guidelines
Always hold the handles when sitting or standing. This helps keep balance. Teach users to move slowly. Quick movements can cause slips. Ensure the floor around the toilet is dry. A wet floor is dangerous. Place a non-slip mat near the toilet. This adds extra safety.
Frequently Asked Questions
What Tools Are Needed To Install A Toilet Seat Riser?
To install a toilet seat riser, you typically need a screwdriver and adjustable wrench. Some models might come with their own tools. Check the product manual for specific requirements. Having the right tools ensures a secure installation, making it safer for the user.
Can I Install A Toilet Riser Without Handles?
Yes, you can install a riser without handles if the user prefers. However, handles provide additional support and safety. It’s essential to consider the user’s needs and mobility level. Choose a model that offers comfort and security for them.
How Do I Clean A Toilet Seat Riser?
To clean a toilet seat riser, use mild soap and warm water. Avoid harsh chemicals that might damage the surface. Regular cleaning prevents bacteria build-up and maintains hygiene. Ensure all parts are dry after cleaning to prevent mold or mildew.
Is A Toilet Seat Riser Adjustable?
Some toilet seat risers are adjustable, allowing customization to fit different toilets. Check the product specifications before purchase. Adjustable risers offer flexibility and can accommodate various toilet heights. This feature enhances comfort and usability for different users.
Conclusion
Installing a toilet seat riser with handles helps caregivers. It improves safety and comfort for those in need. Follow the steps carefully for a successful installation. Each step is simple and straightforward. Check the riser stability before use. Ensure the handles are firmly attached.
This support can make daily tasks easier. It promotes independence and dignity for users. Always prioritize safety during installation. Proper installation can prevent accidents. A well-fitted riser supports mobility. Caregivers can feel assured knowing the bathroom is safer. Remember, a secure riser means peace of mind for everyone involved.