
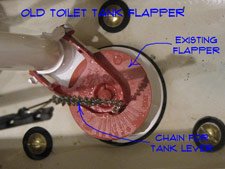
A constant trickle of water running into your bowl is a sign of a faulty toilet flapper. It’s entirely safe to keep using the toilet right now, but water waste starts right away. Drop 4 drops of dark food coloring into the back tank without flushing, wait 15 minutes, and see if colored water enters the bowl.
Table of Contents
How to know if your flapper failed
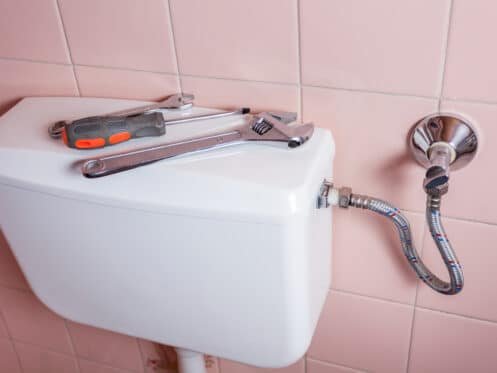
Water leaves the tank through small gaps when rubber parts break down.
| What you notice | What it usually means | What to do first |
|---|---|---|
| Water ripples in bowl | Seal fails at the bottom drain hole | Put food coloring in tank |
| Handle feels loose or sticks | Chain got tangled or disconnected | Unhook chain and untwist it |
| Hissing sound never stops | Fill valve runs because level drops | Push down flapper with finger |
| Toilet flushes only partially | Chain is too long and loose | Move hook two links tighter |
| Dark residue on fingers | Rubber degraded from cleaning chemicals | Replace the flapper directly |
| Water overflows into tall tube | Fill valve float is set too high | Lower float adjustment screw |
Worn out rubber seal
Mineral buildup and water chemicals break down the smooth rubber face of the flapper over time. If your fingers come away with black slimy residue after touching the rim, the seal is shot; if your fingers stay clean, the rubber might just have trapped dirt beneath it. To confirm it, push gently on the top center of the flapper with an old pencil while the toilet is hissing. If the water stops running within 3 seconds, the rubber can’t seal flat on its own anymore.
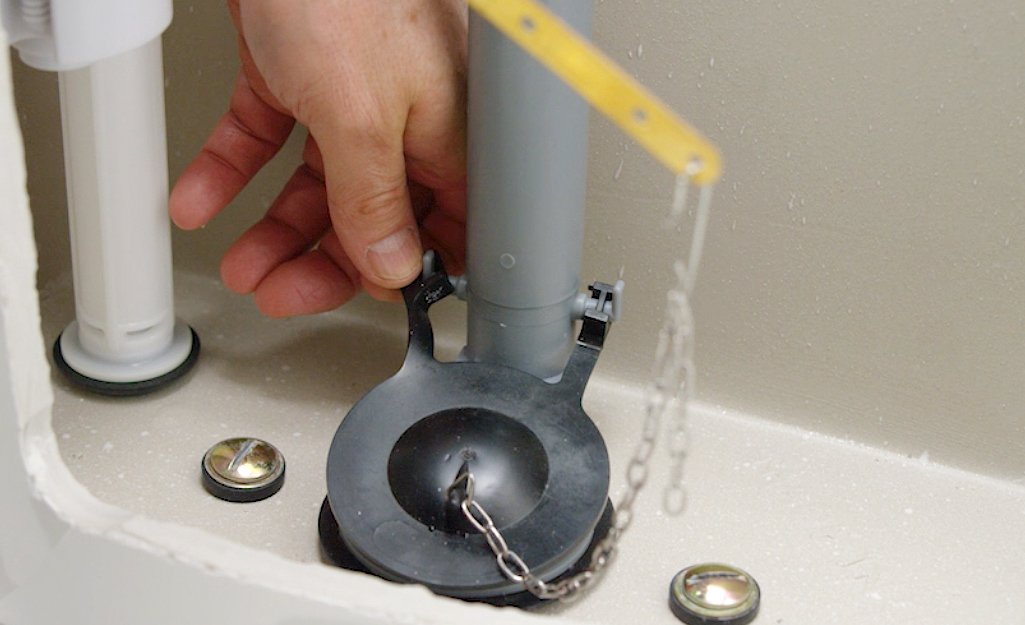
Turn the shutoff valve clockwise until it stops, flush the toilet to empty the tank, and pop the old flapper off its side pegs. Take the old one to the store so you match the exact size, which is usually 2 inches across for older toilets or 3 inches for modern low-flow bowls. Snapping the wrong size in place is a mistake people actually make, and it costs them a second trip to the hardware store when water continues to pour past the opening. This repair isn’t for cracked porcelain tanks, which require replacing the entire toilet. Once you install the fresh unit, the hissing stops completely within 60 seconds after the tank fills.
Tangled or tight lift chain
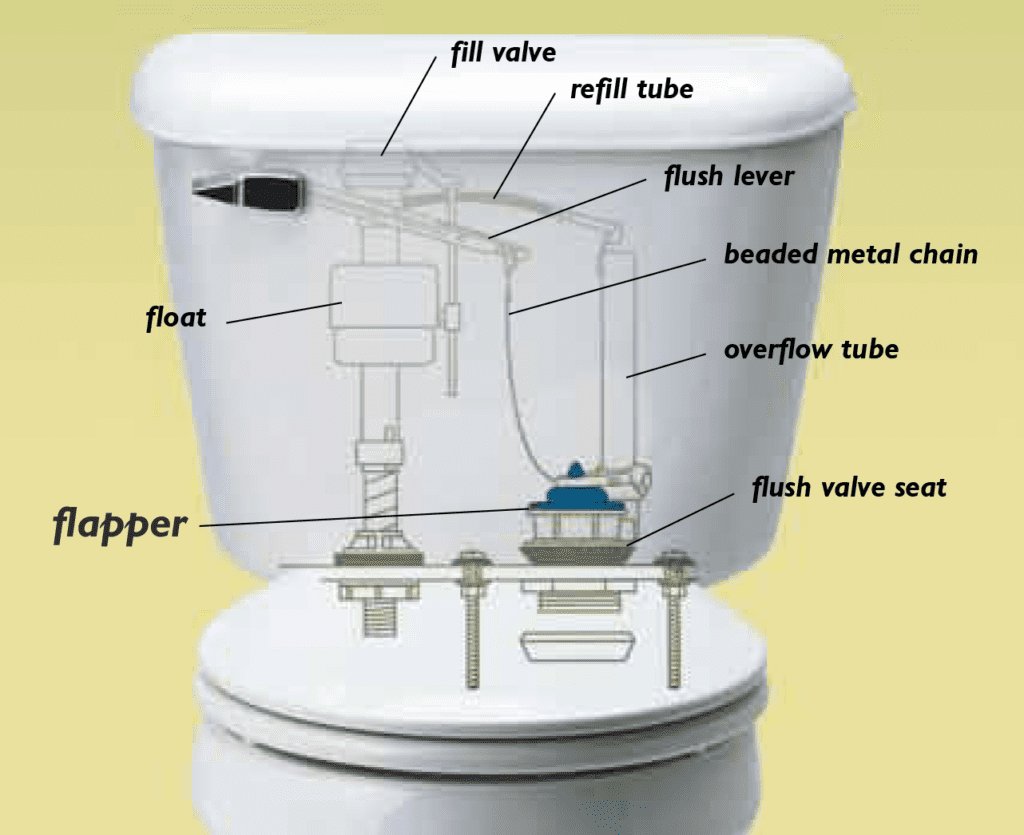
A chain with incorrect slack keeps the seal lifted open or lets it drop off-center. When the chain lacks enough slack, the flush arm holds the rubber pad slightly raised above the drain seat. To check this issue, remove the tank lid and look straight down at the chain while the handle sits at rest. If the chain is pulled tight like a guitar string, it’s keeping the seal cracked open.
Unclip the chain hook from the flush lever arm and move it down until the chain shows about one-half inch of loose wiggle room. The flapper will now drop fully flat against the plastic seat ring. You’ll know this cause from decayed rubber because pushing down with a pencil won’t change anything until you release the chain’s upward tension. You’ll know the fix worked when the bowl water surface goes completely still, with no surface ripples 10 minutes after flushing.
Mineral crust along the drain seat
Hard water leaves rough calcium crust along the plastic or brass rim that the flapper rests against. This problem differs from the first two because the flapper itself feels flexible and the chain has good slack, yet water still slips through small gaps under the rim.
Turn off the water valve at the wall and flush to expose the lower drain hole. Rub your bare fingertip around the smooth rim where the rubber sits; rough, sandpaper-like bumps mean minerals are preventing a tight seal. Scrub the circular seat with an abrasive kitchen sponge soaked in white vinegar for 2 minutes to dissolve the scale. Avoid using chemical bleach pucks in the tank; they trade short-term cleaning for destroyed rubber parts within months. You’ll know the seat is clean when the surface feels smooth to the touch, and food coloring stays locked in the tank for 15 minutes without leaking.
When to stop and get help
Call a licensed plumber when tank repairs move past external parts:
- Water pools on the bathroom floor around the tank bolts, which means mounting gaskets have failed.
- The shutoff valve near the floor turns stiffly, drips, or won’t stop incoming water completely.
- The flush valve seat at the tank floor is cracked, which requires pulling the heavy tank off the bowl.
- You spot hairline cracks in the tank porcelain, which can split open under water pressure and flood the room.
Plumbing supply lines carry high pressure that damages subfloors fast, so turn the main house shutoff if valves refuse to seal.
Frequently asked questions
Can a bad flapper cause high water bills?
Yes. A leaking flapper can waste over 200 gallons of water daily depending on the size of the gap. Check your municipal water utility statement for sudden volume spikes if your toilet runs constantly between normal flushes.
How long does a toilet flapper usually last?
Harsh well water, high chlorine levels, or chemical drop-in cleaning tablets shorten this lifespan significantly.
What happens if the flapper chain is too long?
The toilet won’t flush fully because the flapper drops closed before enough water exits the tank. Extra chain can also drop under the rubber seal and break the watertight closure, which lets water leak continuously into the bowl.
Is it safe to use drop-in bleach tablets in the tank?
No. Strong chlorine tablets corrode rubber seals, plastic levers, and mounting gaskets within several months. Most toilet manufacturers clearly state in their user manuals that drop-in chemical tablets void the factory warranty on internal tank components.
Does it matter what size flapper you buy?
Yes. Standard toilets use either a 2-inch or 3-inch drain opening, and they aren’t interchangeable. Check your toilet model number stamped inside the porcelain tank or measure the drain opening across before buying a replacement part.
Why does my toilet cycle water on and off by itself?
The tank is slowly losing water through a leaky flapper until the float drops low enough to trigger the fill valve. Once the tank refills to the set line, it shuts off, repeating the cycle every 15 to 45 minutes.
Final Thoughts
Replacing this part is an easy project that’ll save you money on your monthly water bill. You can find a universal replacement at any local hardware store for just a few dollars. Don’t wait too long to fix it, as you’ll be glad you stopped that annoying sound once it’s done.
Related guides
- Bathroom Sink Filling With Water By Itself: How to Fix It
- Charcoal Filter for Bathroom Fan: Essential Air Quality Fix






