
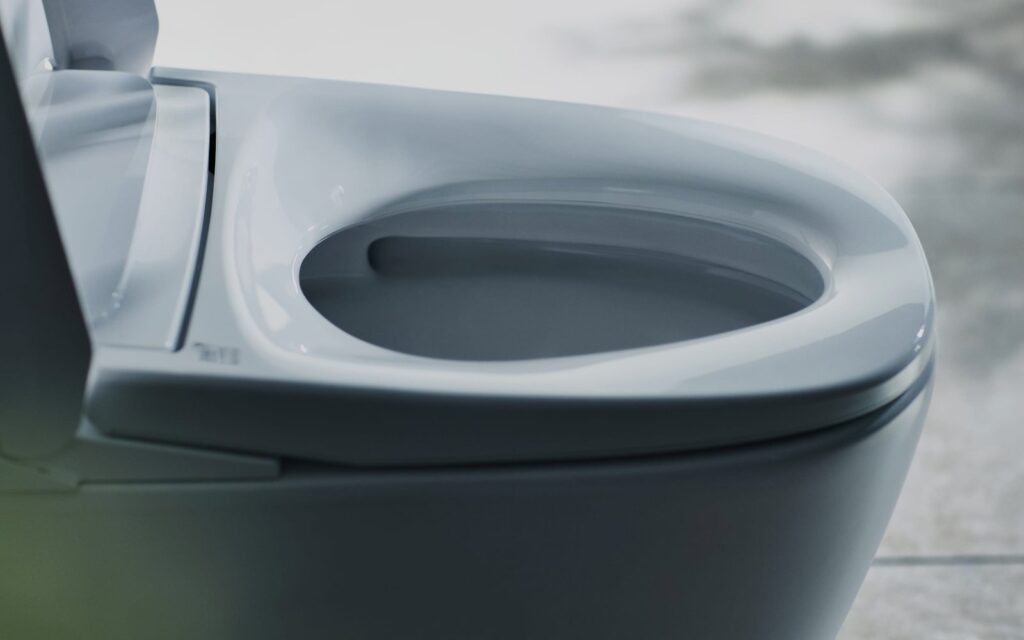
Relying on harsh drop-in tank tablets destroys internal rubber flappers within months, which leads to silent water leaks that run up costly utility bills. For genuine success, improving toilet usability and cleanliness requires fixing physical contact zones, applying disinfectants that sit wet on the porcelain, and maintaining proper mechanical clearance. Switching to weekly targeted bowl scrubbing protects the plumbing while stopping bacteria buildup before foul odors develop.
Table of Contents
Improving toilet usability through proper technique

| What most people do | What to do instead | Why it matters |
|---|---|---|
| Bleach tablet in tank | Scrub bowl weekly with liquid cleaner | Protects rubber valves from chemical decay |
| Slamming lightweight plastic seats | Mount slow-close polypropylene toilet seat | Eliminates loud bangs and cracked hinges |
| Flushing with lid up | Close lid before pressing flush handle | Stops aerosolized droplets from coating counters |
| Storing plunger on floor | Set plunger inside ventilated plastic tray | Prevents bacteria transfer to bathroom tiles |
| Round toilet seat on oval bowl | Match elongated seat to elongated porcelain | Fixes painful pressure points during sitting |
Close the lid before every flush
Flushing an open toilet sprays tiny droplets of contaminated water across walls, toothbrushes, and nearby counters. People leave the lid up because they want to verify that the waste clears the trapway, but the swirling water forces fine aerosol particles several feet into the air. If the lid stays shut during the cycle, those microbes hit the plastic underside instead of spreading across the room.
The trade-off is clear: you lose immediate visual confirmation of the flush, but you avoid scrubbing microscopic waste off nearby baseboards every single week. This setup isn’t for public commercial stalls that lack lids entirely. Make it a strict household rule to lower the lid completely before pushing the lever down. Check the underside of the lid once a week during cleaning; wipe away any yellowed moisture droplets using two sprays of hydrogen peroxide cleaner and a disposable paper towel.
Allow liquid disinfectant full dwell time
Wiping disinfectant off porcelain immediately after applying it leaves thousands of living bacteria behind. People spray a surface and instantly wipe it dry because they want the porcelain to look shiny right away, but chemical sanitizers require liquid contact time to break down microbial cell walls. If the chemical stays wet on the ceramic for 10 full minutes, it kills bacteria; if you wipe it off in 15 seconds, you only smear dirt across the rim.
Apply a standard acidic toilet bowl cleaner directly under the interior rim of the bowl according to the manufacturer’s instructions. Let the gel slide down the dry porcelain surface and remain undisturbed for at least 10 minutes before touching it with a brush. This varies by model and brand—check the label on your cleaner bottle for exact sanitizing contact times. Mist the seat, hinge bolts, and flush lever with liquid disinfectant until thoroughly wet, then set a timer. Wipe the surfaces dry with clean microfiber cloths only after that dwell period ends.
Upgrade physical seat hardware and clearance

Standard loose seat hinges shift under body weight, pinching skin and making normal use unstable and frustrating. People ignore loose plastic mounting nuts because reaching behind the ceramic base feels awkward, which allows the seat to slide sideways across the porcelain rim. If the seat shifts, do A: replace flimsy hardware with top-tightening stainless steel bolts and rubber expansion washers; if the toilet bowl measures 18.5 inches from bolts to front edge, do B: install an elongated seat rather than a compact 16.5-inch round seat.
Mounting the wrong size seat leaves an exposed porcelain lip that catches urine drips and causes unnecessary skin discomfort. Tighten top-mounting bolts until the rubber grommet expands completely inside the porcelain hole, securing the seat firmly against lateral movement. A sturdy slow-close seat costs slightly more up front, but it prevents pinched fingers and stops loud midnight hinge slamming permanently. Check bolt tightness regularly by attempting to wiggle the seat side to side by hand.
Advice you can ignore
- Pouring boiling water down the bowl to clear clogs.
- Using chemical drop-in tablets inside the freshwater tank. Strong chlorine bleaches eat through silicone flappers and fill valves within six months, causing constant water running.
- Scrubbing hard water rings with steel wire wool. Metal fibers scratch the glazed porcelain finish, creating rough grooves where mineral deposits and dark mold latch on permanently.
- Using automatic clip-on rim blocks for total hygiene. These plastic cages block water jets under the rim, leaving half the bowl unwashed while trapping grime behind the plastic bracket.
The right way, start to finish
- Clear all items off the toilet tank and surrounding floor, allowing unobstructed access to the bowl and water supply line.
- Apply liquid toilet bowl cleaner under the interior rim, coating the entire inner surface evenly.
- Close the lid and spray the flush handle, lid, seat, and exterior ceramic base with disinfectant until visibly wet.
- Wait 10 minutes without touching the fixtures to give the cleaning chemicals adequate dwell time to kill surface bacteria.
- Scrub the entire inside of the bowl with an angled nylon bristle brush, paying special attention to the underside jets.
- Push the brush head down into the trapway hole firmly three times to clear collected soil and mineral sediment.
- Close the toilet lid and activate the flush lever once to rinse the chemical residue away cleanly.
- Wipe the exterior handles, seat, and tank dry using a clean microfiber cloth, checking hinges for loose movement.
Frequently asked questions
Can toilet bowl cleaner damage the seat?
Yes. Acidic bowl cleaners strip the clear protective coating off plastic and wooden toilet seats instantly, creating permanent dull patches or rough chemical burns. Never spray strong bowl cleaner onto the seat; use a mild, pH-neutral disinfectant spray specifically labeled for plastics on those upper surfaces.
Why does my toilet seat keep shifting sideways?
Plastic hinge bolts stretch and loosen under daily body weight. Check underneath the mounting deck behind the bowl; if your unit uses smooth plastic wing nuts, swap them out for heavy-duty bolts that feature expanding rubber sleeves to lock the hinges securely into the ceramic holes.
How long does disinfectant need to sit to kill germs?
About 10 minutes. Most consumer disinfectant sprays must stay visibly wet on non-porous surfaces for 5 to 10 minutes to eliminate viruses and bacteria completely. Wiping the liquid away immediately removes the chemical before it finishes neutralizing microscopic pathogens on the handle or seat.
Is it safe to mix bleach with vinegar for deep cleaning?
No. Mixing bleach with vinegar creates toxic chlorine gas, which causes severe chemical burns to your eyes, throat, and lungs within seconds. Never combine different cleaning chemicals in the bowl; rinse one product down completely with clean water before introducing another sanitizing substance.
What happens if you flush with the lid up?
The turbulence forces fine water droplets and bacteria into the air, settling across surrounding counters, towels, and flooring. Closing the lid contains the spray entirely inside the bowl compartment, keeping the rest of the bathroom surfaces clean and sanitary between scheduled weekly scrub sessions.
Does hard water ruin toilet flush power?
Yes. Dissolved calcium and magnesium build thick white scale inside the small water jets beneath the rim over time. This blockage slows the incoming water volume during a flush cycle, which stops the bowl from forming the strong natural siphon needed to evacuate waste efficiently.
Final Thoughts
You’ll find that these small adjustments make a world of difference in your home’s comfort. Once you’ve swapped those harsh chemicals for a gentle brush, you won’t want to go back. Why not pick up a high-quality bowl cleaner today? It’s a simple change that’ll keep your bathroom fresh for years.






